As you become more acquainted with the WordPress Gutenberg block editor, you might find some of these tricks to be time-savers.
Next Step
Quick-create a new block with typing
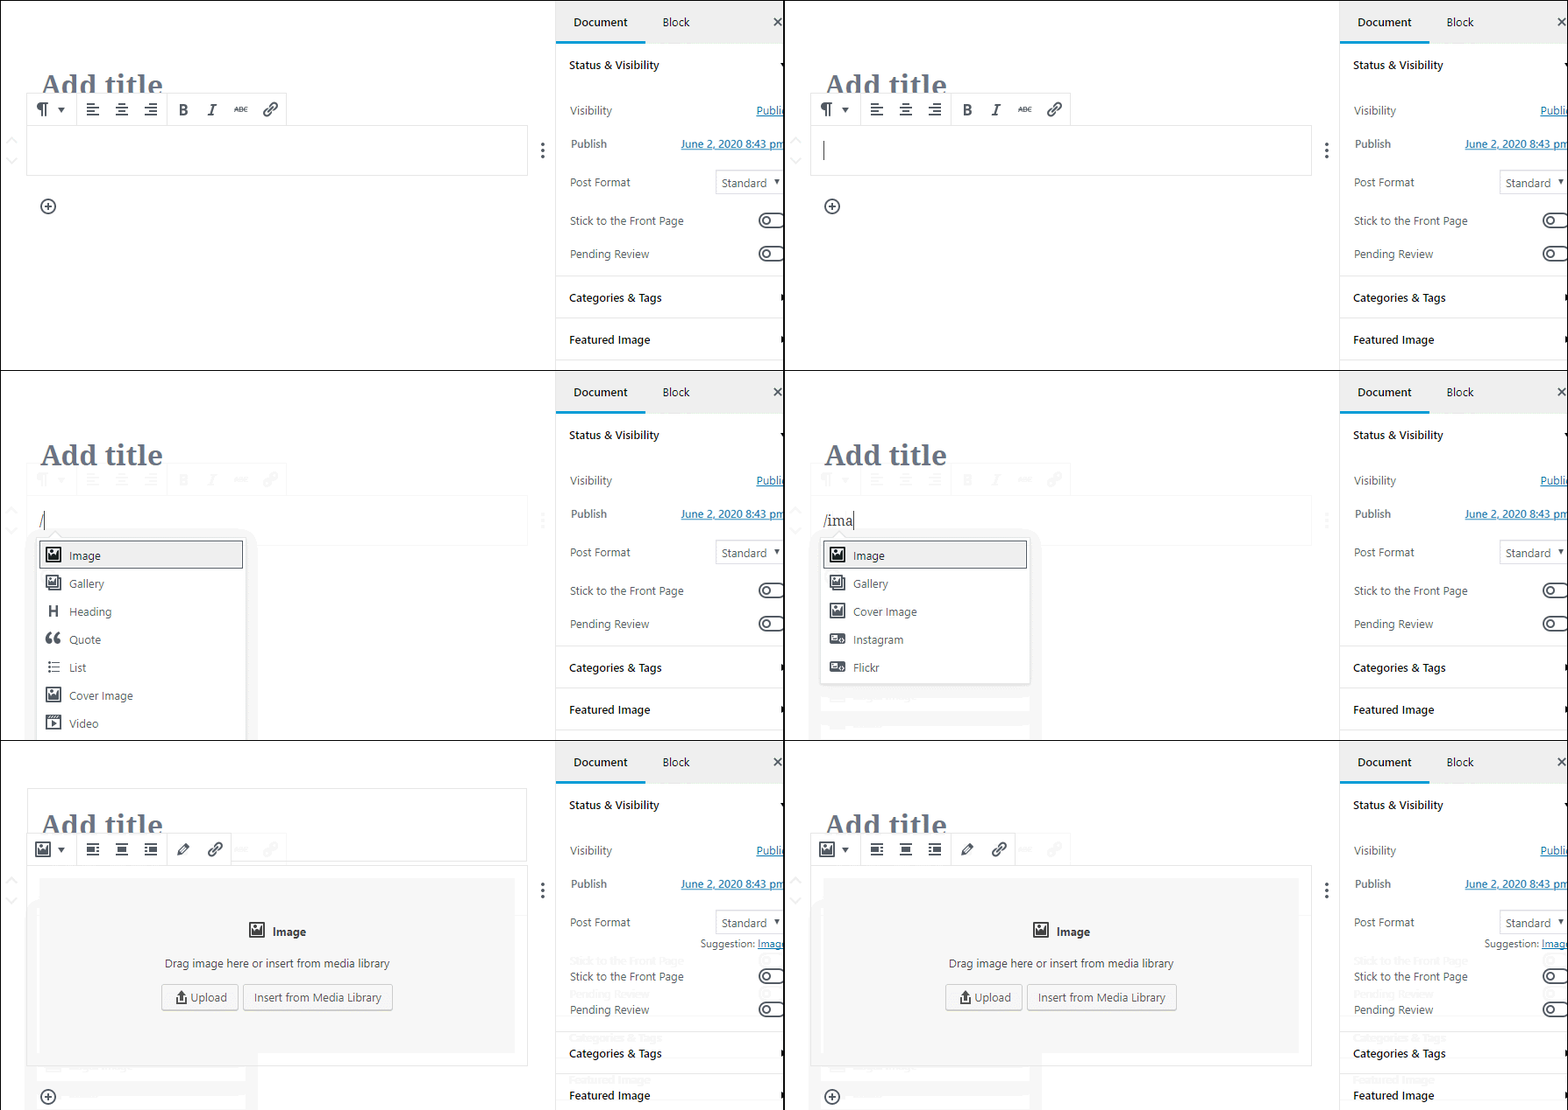
You’ve been shown how to create blocks using the insert button, but to save time, you can create blocks by simply typing this syntax [/BLOCK-NAME]
An auto-suggest box will appear to help you find the relevant block. Find below an example to create an image block using this syntax. Pretty convenient and a big time-saver!
Editing source code directly
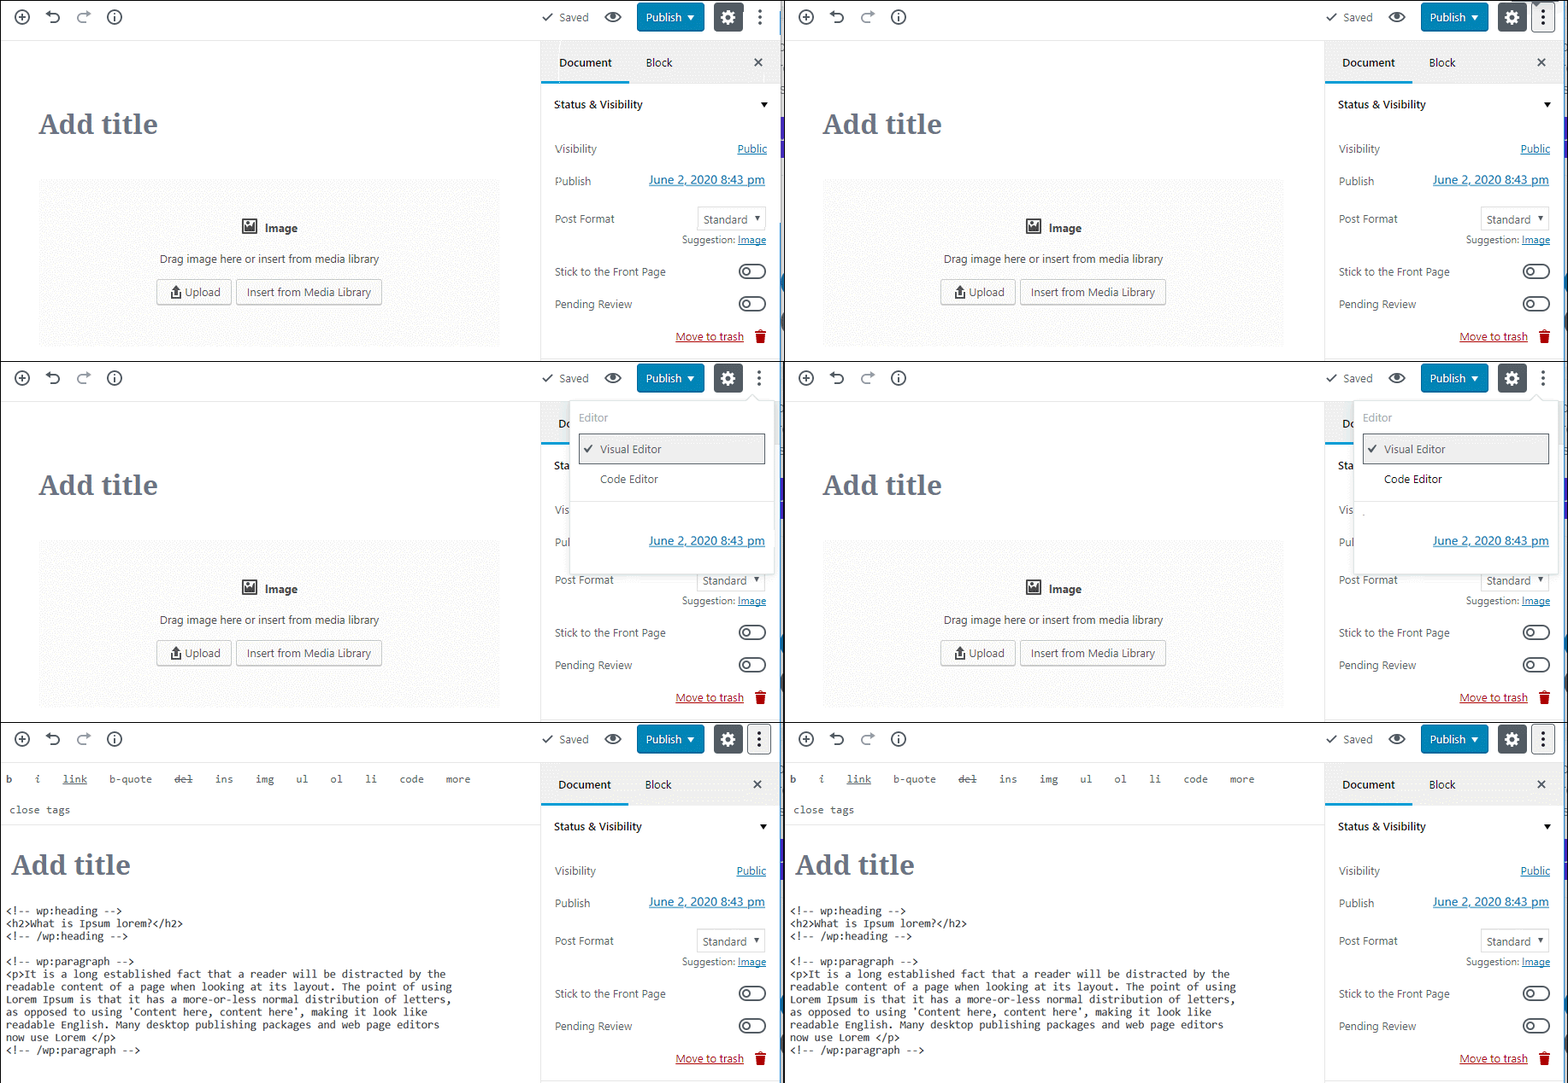
You can edit the source code for your entire page or post by clicking on the three dots in the top-right corner and selecting Code Editor:
Editing source code directly
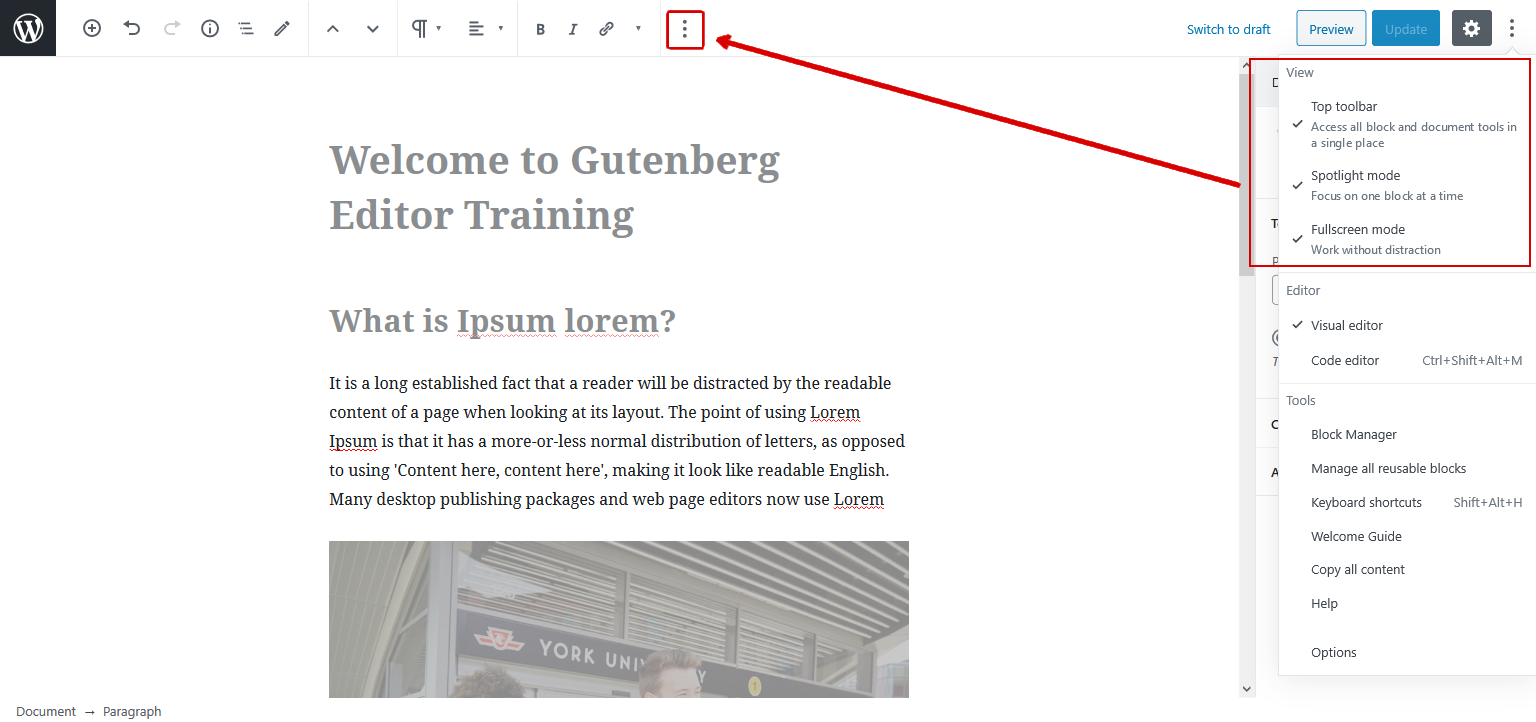
The new block editor includes a few different modes that let you change the editing experience. You can:
- add a fixed toolbar like the TinyMCE editor
- put a “spotlight” on the active block
- go full screen
To use these “Views”, click on the three dots icon in the top-right corner.
Gutenberg keyboard shortcuts
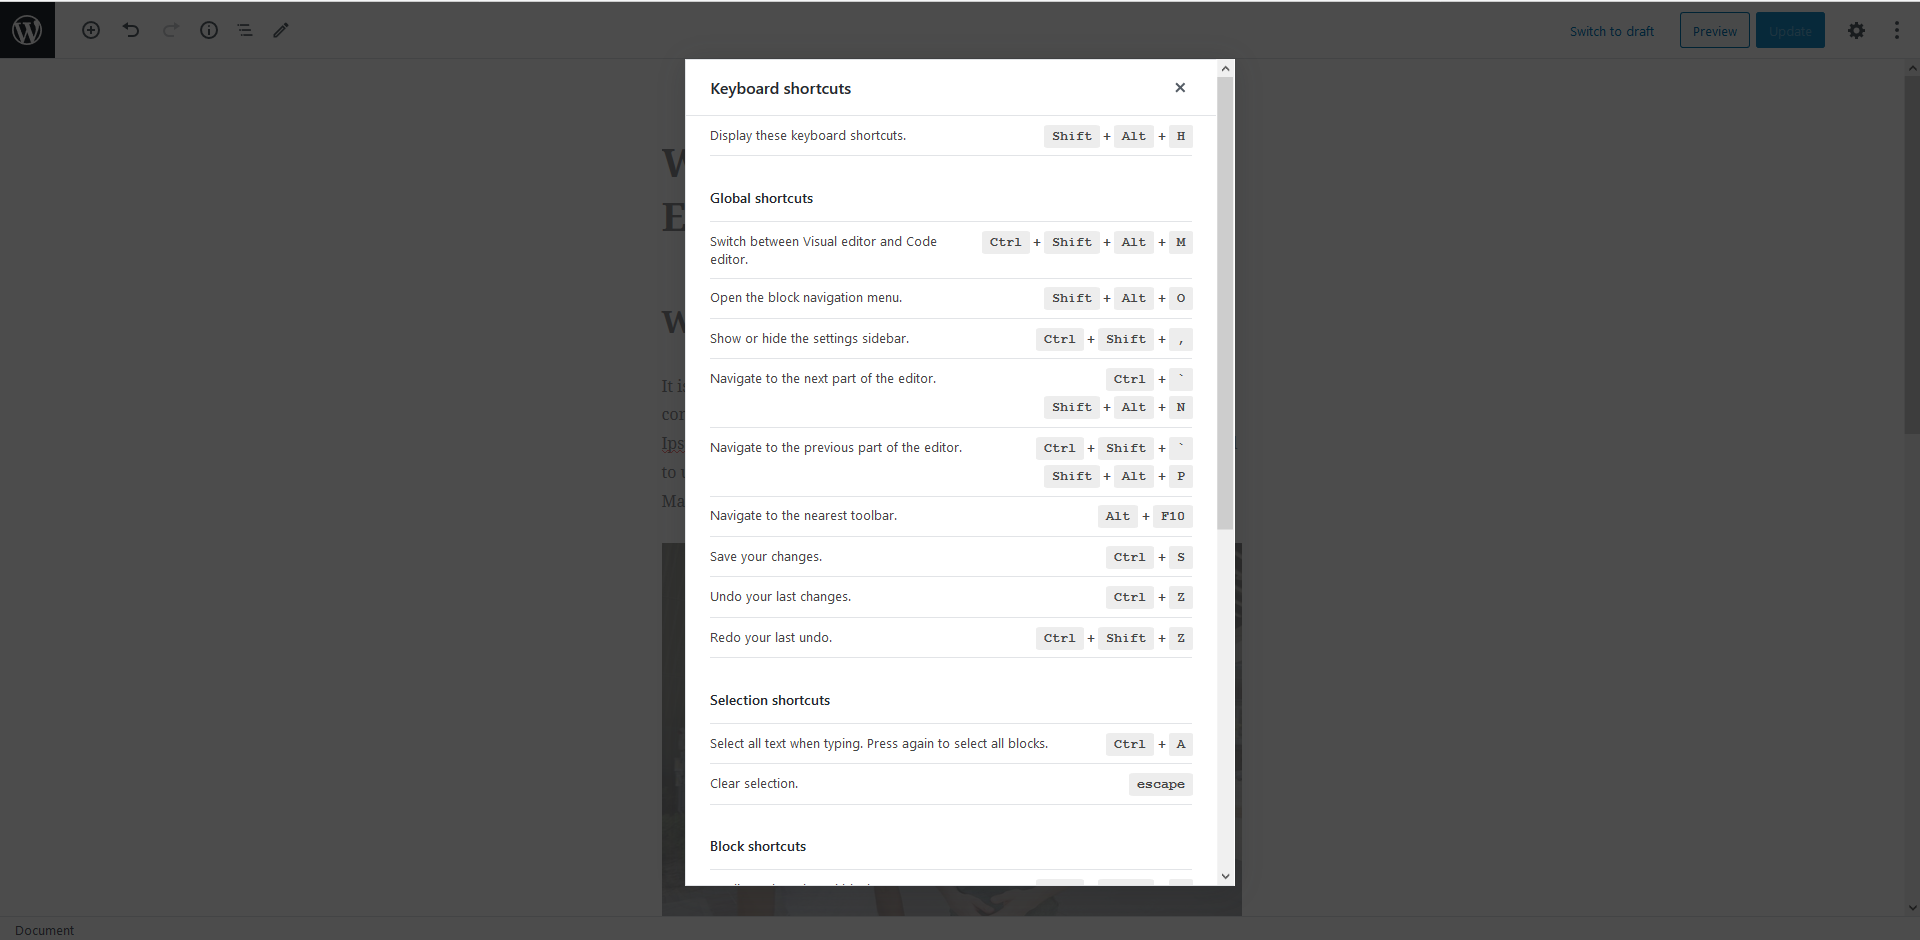
Beyond standard formatting shortcuts, the block editor has several dedicated keyboard shortcuts that can help you i.e.
- insert new blocks above or below the selected block
- delete a block
- duplicate a block
- etc.
To open the full list of keyboard shortcuts, use the Shift + Alt + H shortcut.
Reusable block templates
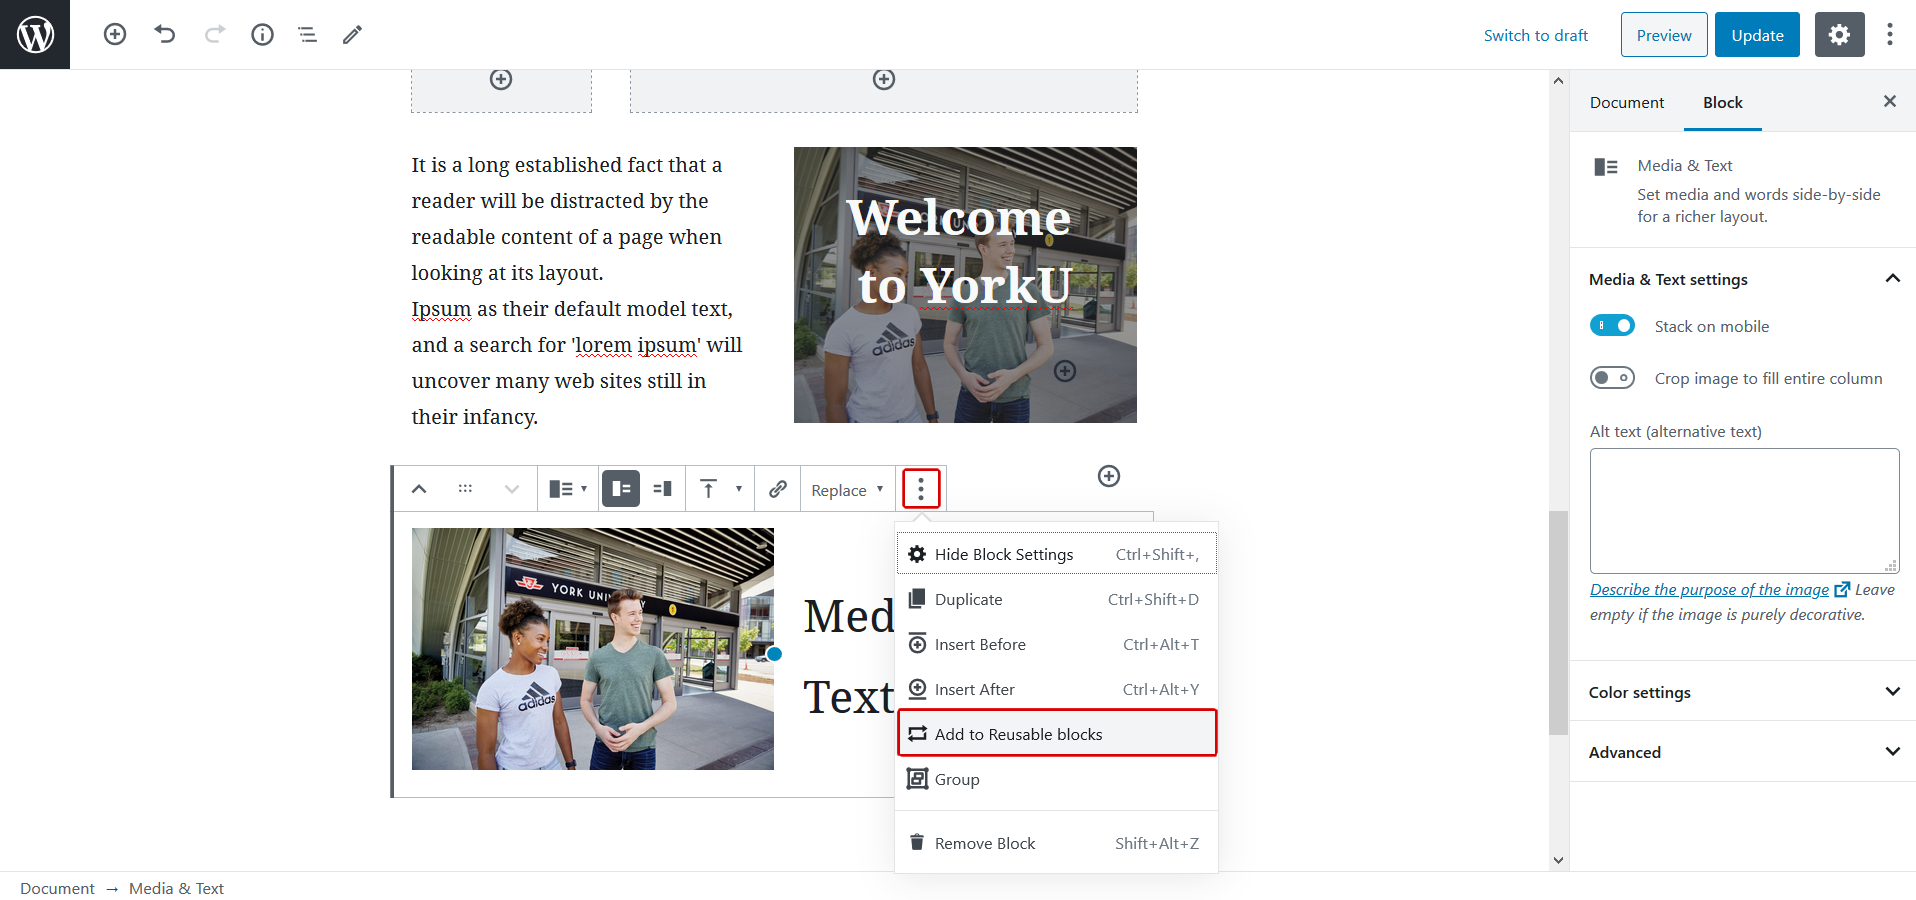
If you have a specific collection/arrangement of blocks that you need to reuse in multiple spots, you can save a group of blocks as a reusable template. You’ll be able to name your template.
Then, you can insert it just like you would a regular block.
To create your template:
- select the blocks that you want to include
- click the three dots icon
- select Add to Reusable blocks
Editing reusable block content
Beyond making it easy to quickly insert formatted content, reusable blocks also let you quickly update all instances of that reusable block.
That is, once you edit the reusable block content, every single post that uses that reusable block will also get the new content.
To edit a reusable block, scroll to the Reusable section in the block inserter and click the Manage all reusable blocks button.
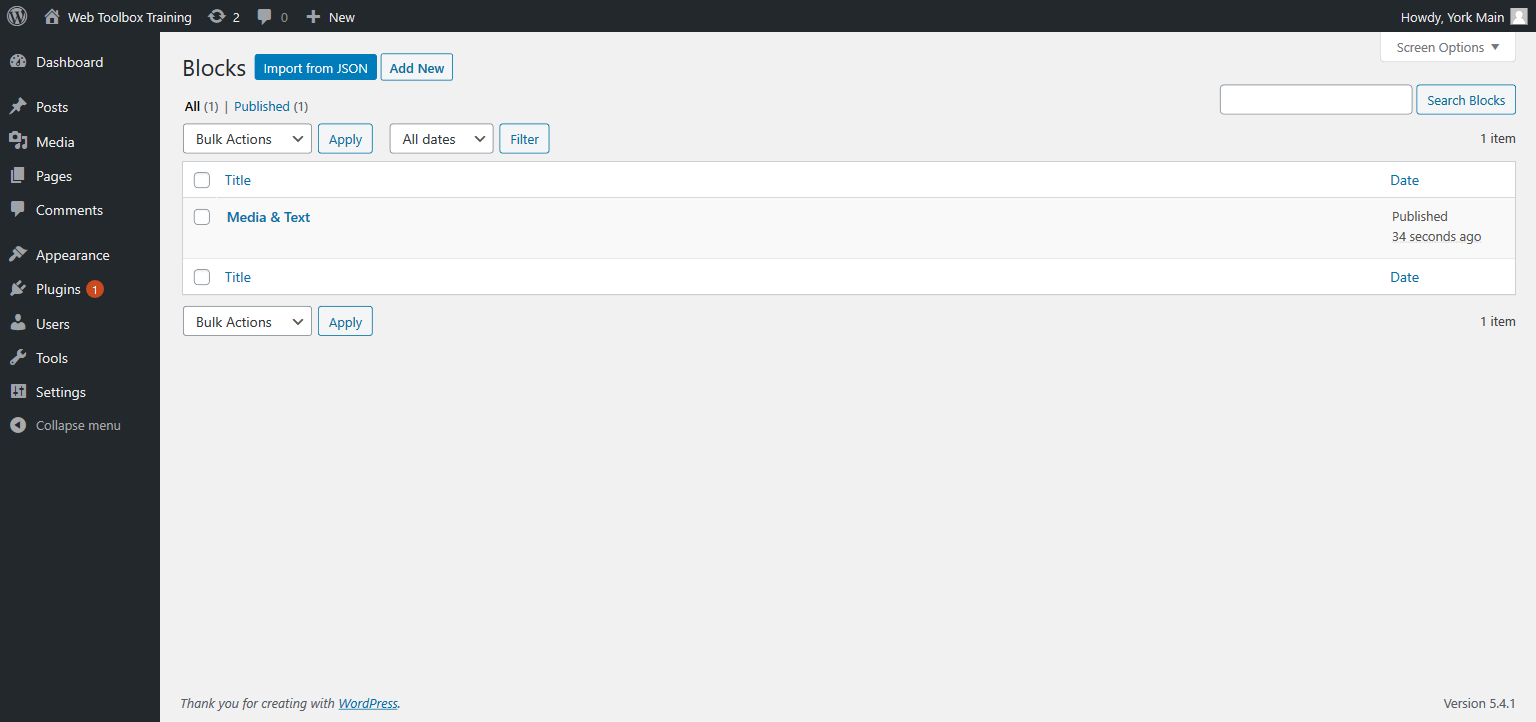
You can import blocks and export blocks.
Controlling clutter with Block Manager
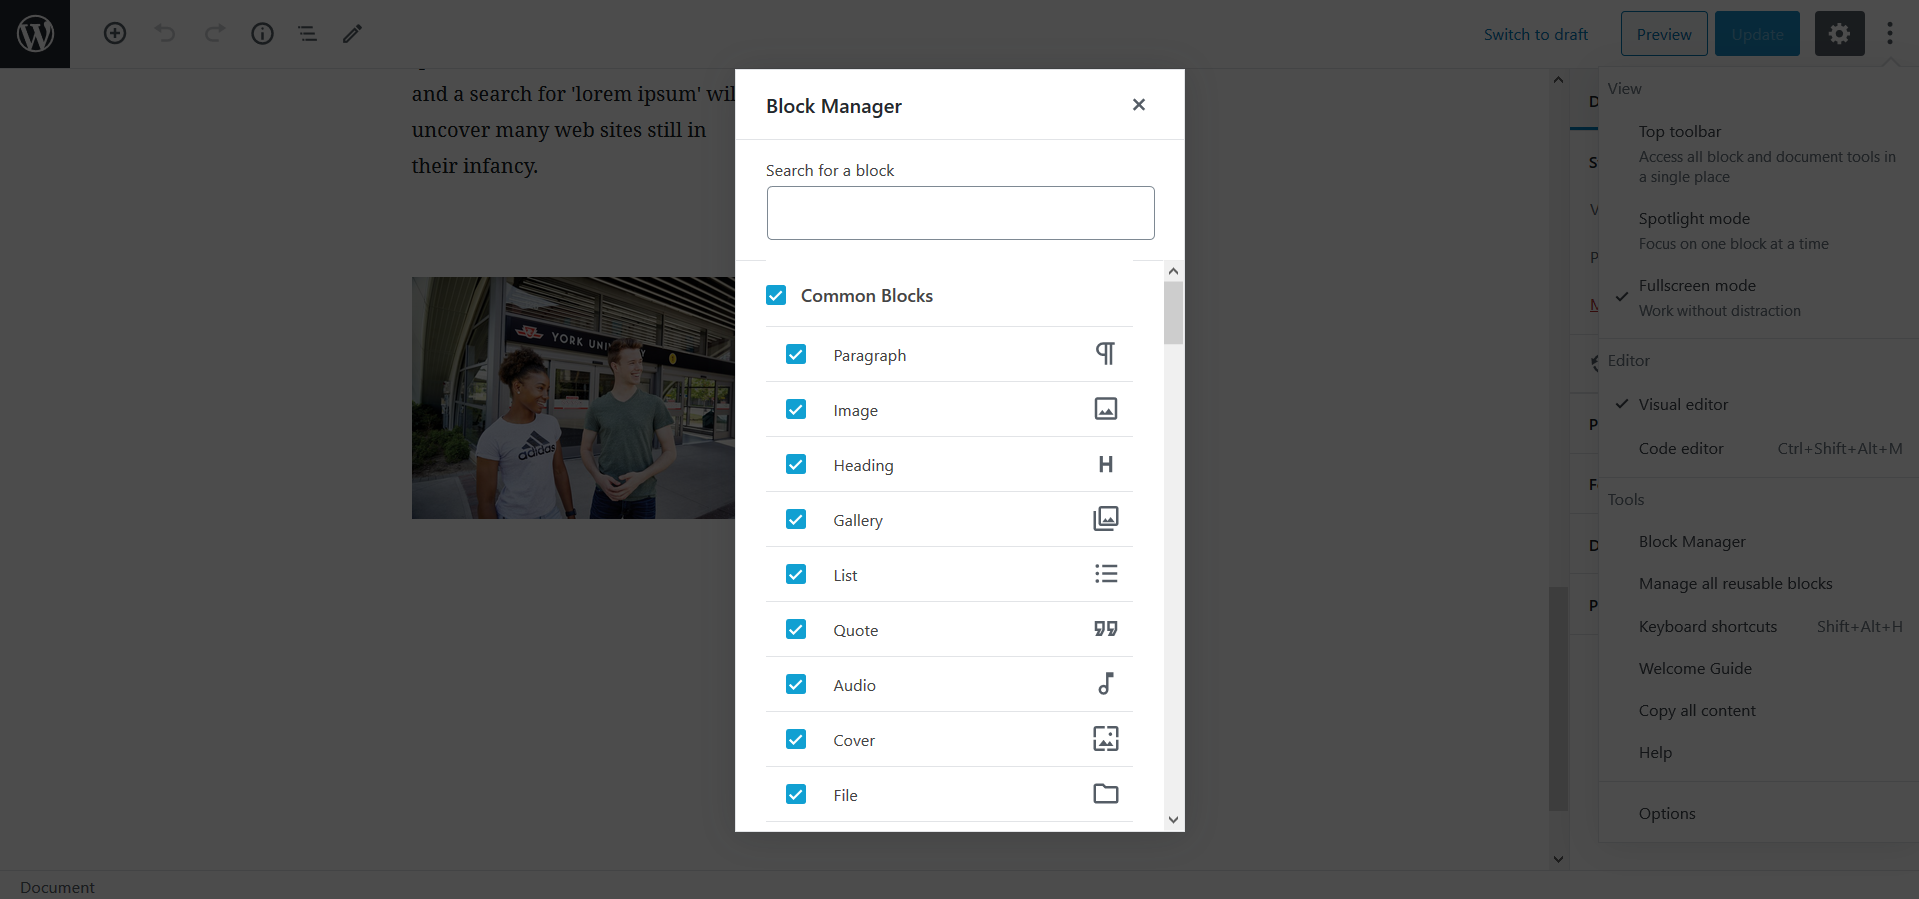
The Gutenberg editor adds a lot of blocks, especially with the inclusion of custom York blocks. This may make things a little cluttered and slow you down. If there are some blocks you never plan to use, you can use the Block Manager to disable them.
To use the Block Manager:
- click the three dots icon in the top-right corner
- select Block Manager
- use the checkboxes to disable blocks as needed
Using Block Navigation to quickly navigate content
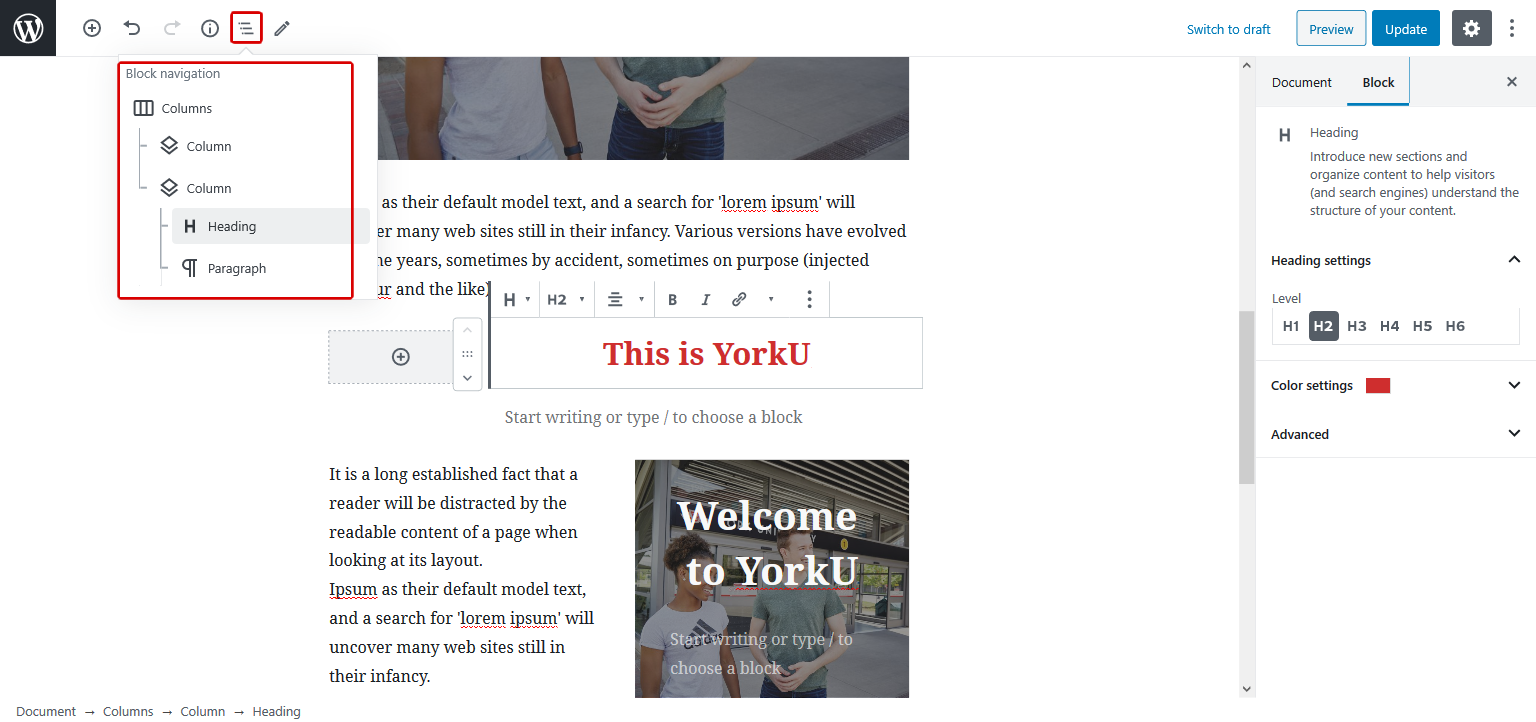
For lengthy content, or content where you use lots of nested blocks, it can be tough to quickly find the block that you’re looking for.
To help, the block editor includes a Block Navigation tool, which you can open by clicking on the toolbar or using the Shift + Alt + O keyboard shortcut.
If you’re inside of a nested block (such as columns), the Block navigation tool will show all the nested blocks. To select a specific block, you can click on it in the list.
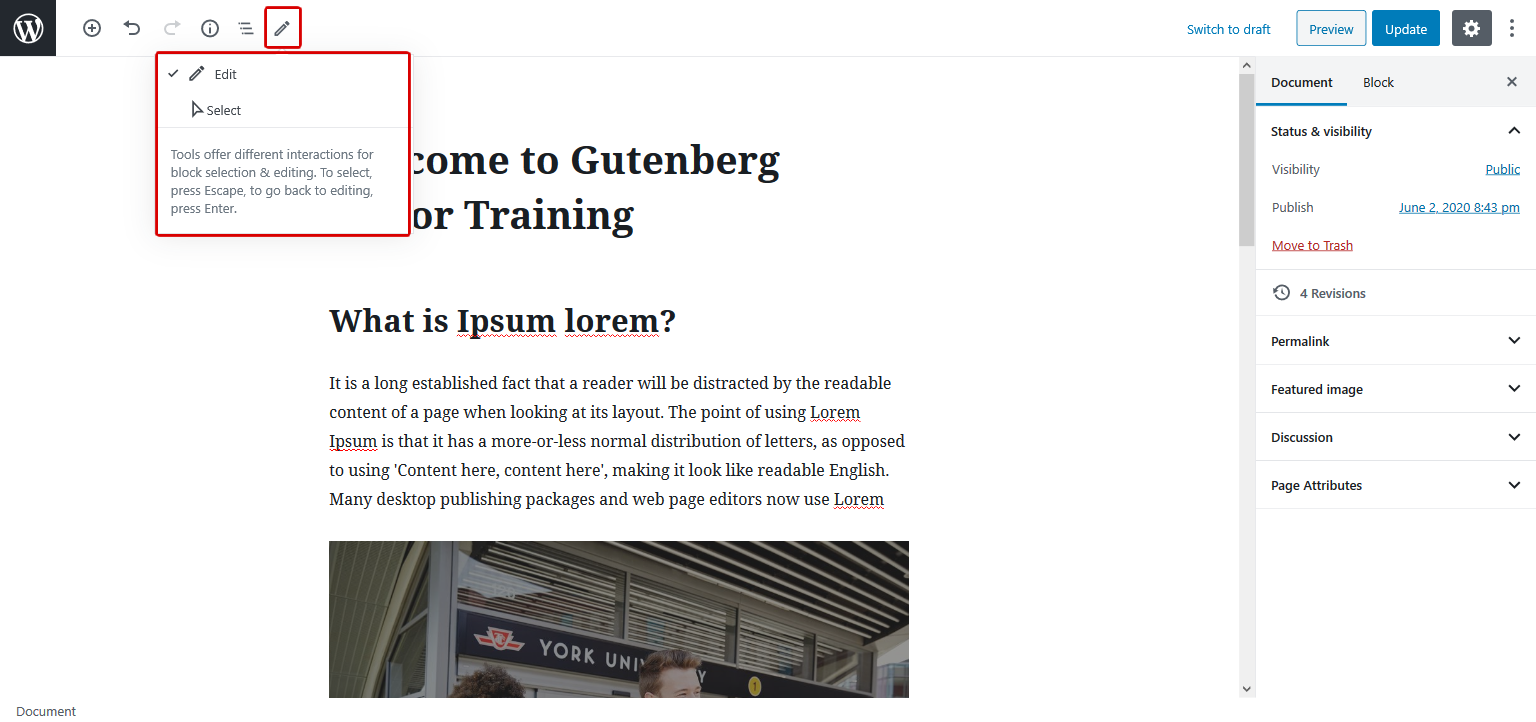
Switching between Edit and Select modes
With WordPress 5.4, you get access to two different modes, which you can switch between using the top toolbar:
- Edit – this is what you’ll work in most of the time. It lets you edit the content of all your blocks. This is the default editor mode.
- Select – this makes it easier to select specific blocks, especially when working with nested blocks (e.g. blocks inside a column). Once you click into a block, you’ll automatically switch back to Edit mode.
Removing/deleting a block
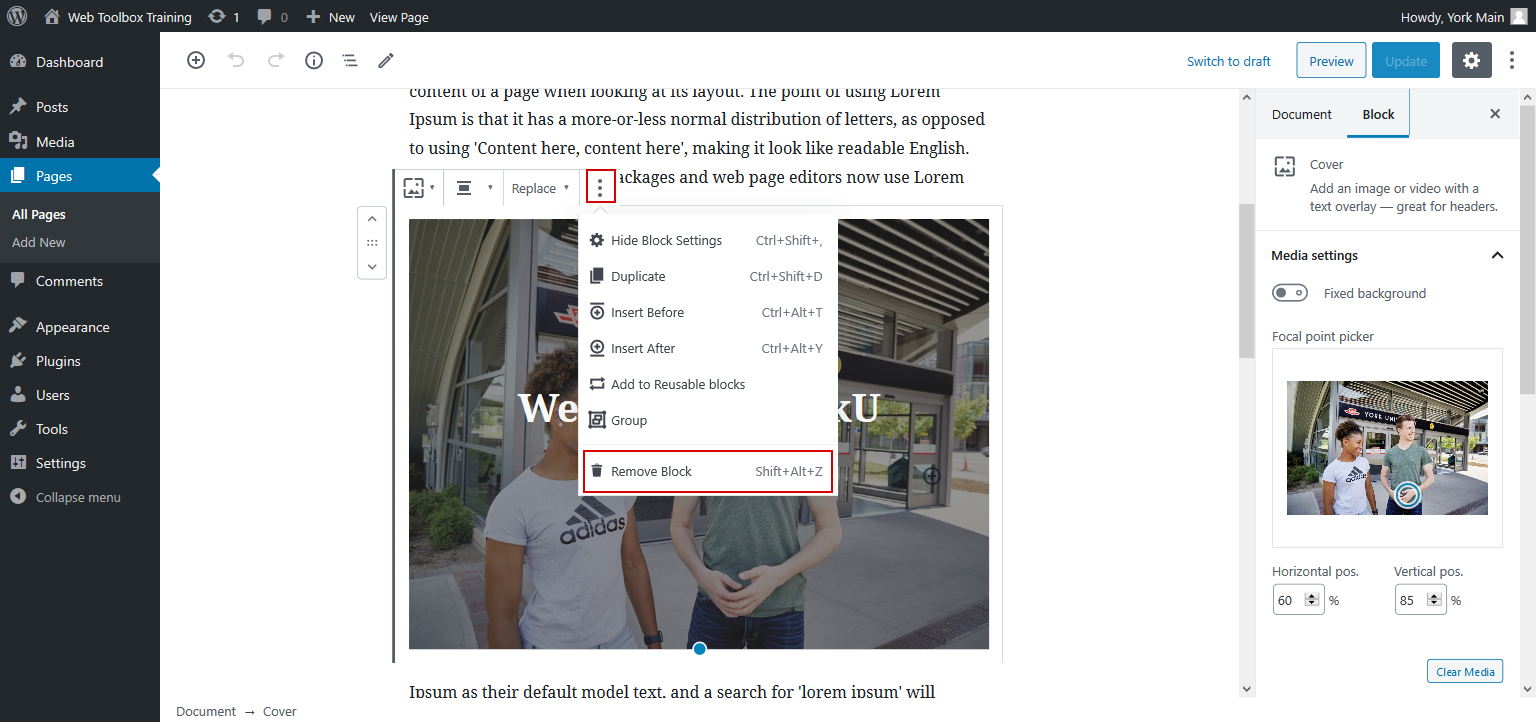
To remove blocks from the Gutenberg editor, follow these steps:
- click on the block you want to remove
- click on the More Options menu (the three dots) in the top navbar
- in the drop-down, click Remove Block
This process will remove the selected block from the page or post.

Learn More
Learn how to manage your old content from WordPress Classic Editor
