After a few months twiddling PIC16 bits in simulation I need to get three, three-hour lab sessions written up for the PIC16F84. The school has provided me with two versions of their PIC16F84A boards, one designed for Mechatronics students and one for EE students.
The board designs date to the dawn of the Arduino era (2005) and so reflect a different engineering education reality when in-house-designed hardware was cost effective and hardware debuggers weren't common. When I arrived at my first academic job (pre-York) in Toronto the teaching unit there relied on a similar board, but designed around the 68HC11.
Unlike the 68HC11 situation, the INSA folks are keen to try something new. The first change is a pedagogical one. Rather than make the labs Assembler-focused, we're going to focus on exploring the hardware using C, a debugger-centric approach that involves disassembly and limiting from-scratch Assembly to places where it makes sense, like Interrupt Service Routines.
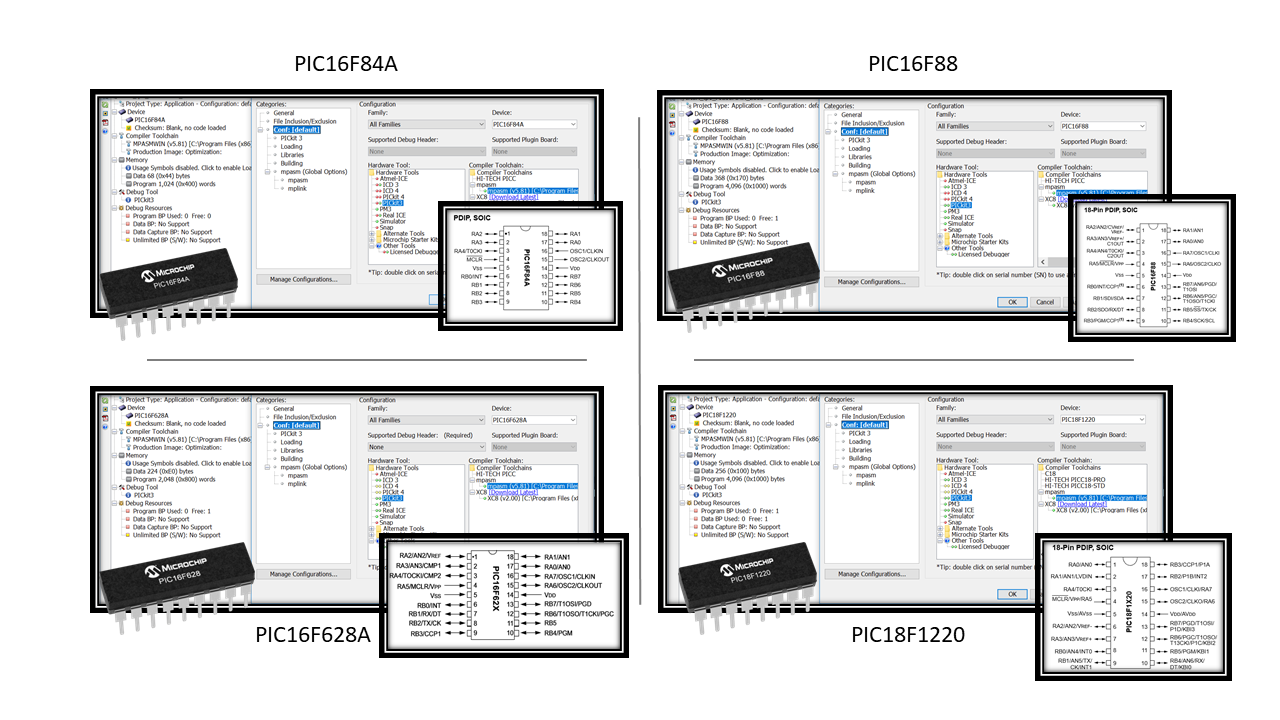
The second change is the one I'm mulling over right now. It's a hardware change. Either take the existing board and run the PIC16F84A on it, with no hardware breakpoints (as shown in the figure below), or swap out the chip with one of three alternatives that support hardware breakpoints via the PICKit3. More dramatically, we could also switch out the in-house board for a PIC16F1619 on a Microchip Curiosity board, with built-in debugger for $10 a pop, on sale.
Now the lack of the hardware breakpoint is a real deal-breaker for the '84. Just like it was for the 68HC11 when comparing it to the 9s12 back in 2008/9. There is nothing else that's wrong with it. It's simple, with limited need for pin multiplexing. That's great. But to take a debugger-friendly approach to teaching microcontrollers really requires breakpoints, live, on the board. I'm not the only one who has looked at drop-in replacements for the '84A (e.g. here). So, next week, when my Digikey order comes in I'm going to test out two or three alternative chips to the '84A.

Comparison of PIC16F84A and the PIC16F88, the PIC16F628 and the PIC18F1220. All have 18 pins and appear to be pin-compatible.
