Virtual Programming Lab can be a little intimidating to use, but once you get the swing of things, it's pretty good. So, let's get you started with the simplest possible working example. We assume that:
- you have Moodle working at your institution
- someone has installed VPL on Moodle and
- you don't need or have access to a local VPL server that connects to Moodle.
By default, the VPL Moodle activities are set to set data to a server in Spain that hosts compilers and development tools that can be used to evaluate student submissions. We'll use that server for this example.
Step 1: Set up a VPL Assignment on eClass (Moodle)
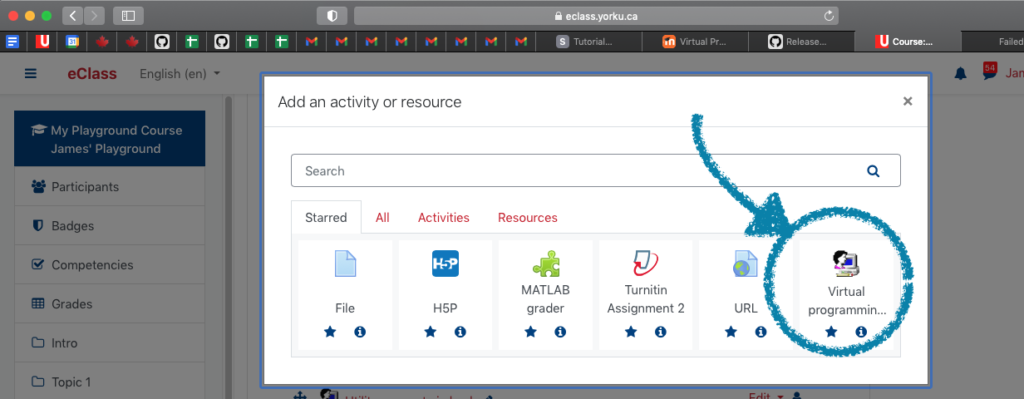
In eClass (Moodle), add a VPL assignment.

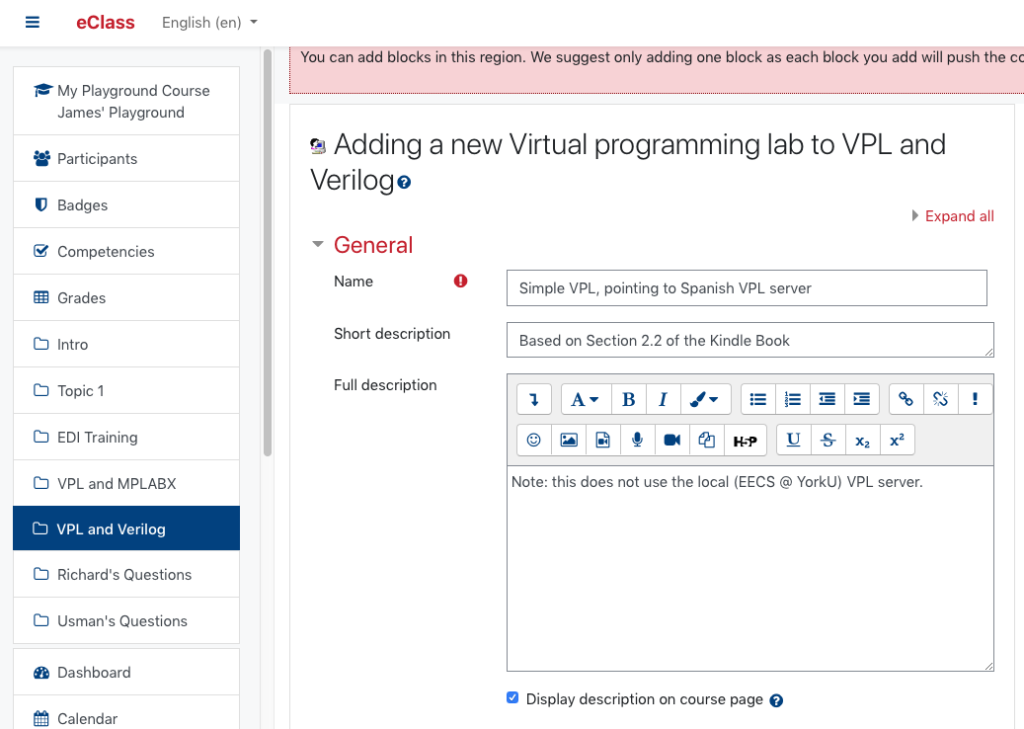
Note, the VPL icon may be in a different location in the "Add an activity" menu. Try "Activities" or "All" if you don't see it immediately. Now, describe the assignment. Skip all the "Submission period", "Grade", "Tags", etc. settings. Then, "save and display."

Step 2: Access the Editor via the Edit tab
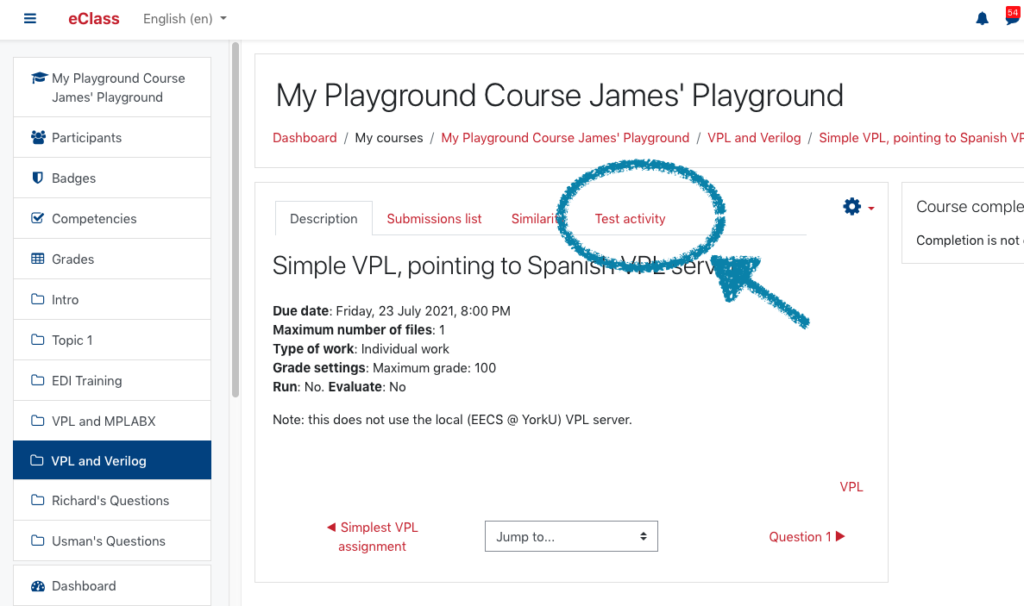
We're going to create a simple file for testing within this VPL activity. Now that you've set up the assignment and displayed it, click on the Test activity tab, shown below.

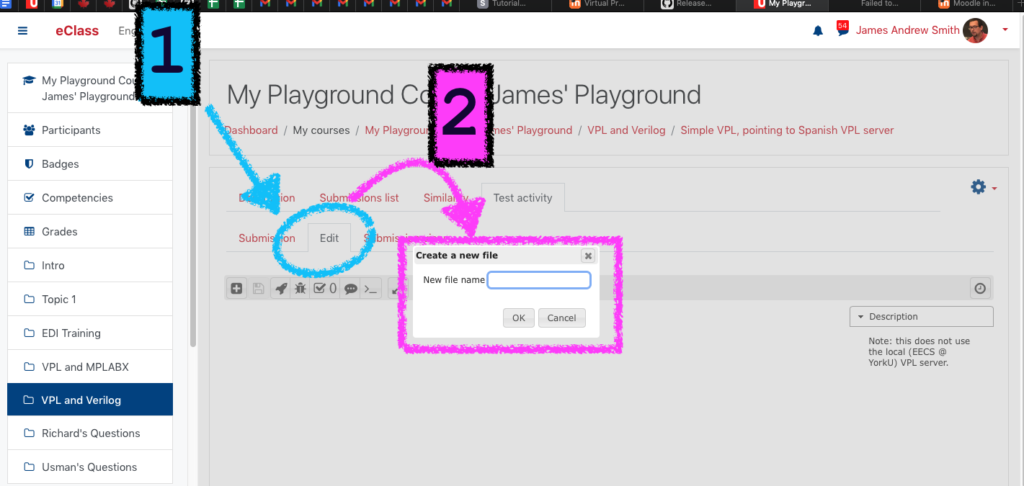
You will now see the "Edit" tab. Click on the Edit tab. A "Create a new file" window will appear, superimposed over the Editor window.

Name your test program file here. The file extension is key as this allows VPL to determine which programming language you intended to use. If it's a Java program, name it somethingSomething.java. If it's a Python program, name it blahBlah.py. Me, I'm going to test out a Verilog program and I'll call it myVerilogProgram.v.

My program is this:
module TestModule;
reg [8:0] x; // an 8-bit registerinitial
This is my Verilog test program. Feel free to copy and paste.
begin
$display($time, " ", x);
x = 0;
$display($time, " ", x);
x = x+2;
$display($time, " ", x);
$finish;
end
endmodule
Step 3: Run the program
Write it in the editor area and save it using the old-school diskette icon.

Now it's time to run your program. Click on the rocket icon to run it.

When you run the program a black console will appear superimposed on your editor. If your program prints anything, it will appear here. In my example, three lines appear and show the time (left) and variable value (right).

Error? VPL will find it for you!
If you mistype something, VPL will tell you when it tries to run or compile your program.

Next steps: Getting more help
I like looking up things on
- The VPL main website
- The Moodle VPL support page
- A downloaded copy of the VPL source code
- The Kindle book on VPL (it's inexpensive but could use a good edit to clean it up a bit; however, it's a decent reference)
