York University offers a variety of internet access options to keep you connected on campus:
- AirYorkPLUS: Secure, high-speed Wi-Fi available across campus.
- eduroam: Wi-Fi for visitors from participating institutions
- AirYorkGUEST: An open Wi-Fi network for guests and visitors.
- Virtual Private Network (VPN): Securely access university resources and services from off-campus locations, ensuring your data remains protected while working remotely.
Whether you’re teaching, conducting research or working on campus, our internet services provide the connectivity and security you need. For optimal Wi-Fi performance, please consult our recommendations on choosing a Wi-Fi client device.
**Please note any other wireless networks available on campus are not supported by UIT and should be avoided.
Featured Services
Overview
AirYorkPLUS provides wireless Internet access to York community members featuring improved security, performance, convenience and mobility. It features:
Single sign on
Once you configure your Wi-Fi client (laptop or tablet computer, smartphone, etc.) with your Passport York credentials, the client will automatically connect to AirYorkPLUS as soon as it is within range of an AirYorkPLUS access point.
Security
Network traffic is encrypted between the client and the AirYorkPLUS access point.
Performance
Better performance in high-density settings such as lecture halls and libraries where many Wi-Fi clients are active simultaneously.
**Please note most performance improvement are available only to Wi-Fi devices with dual-band radios. For further details, please consult UIT’s recommendations on selecting/purchasing a Wi-Fi client device for use on-campus at York.
Who is it for?
AirYorkPLUS is for current students, faculty and staff that use Passport York login for their daily academic online activities at York University.
How so I access it?
You will need your Passport York username and password to connect to AirYorkPLUS.
Configure and connect to AirYorkPLUS as per instructions for the operating system of your device below:
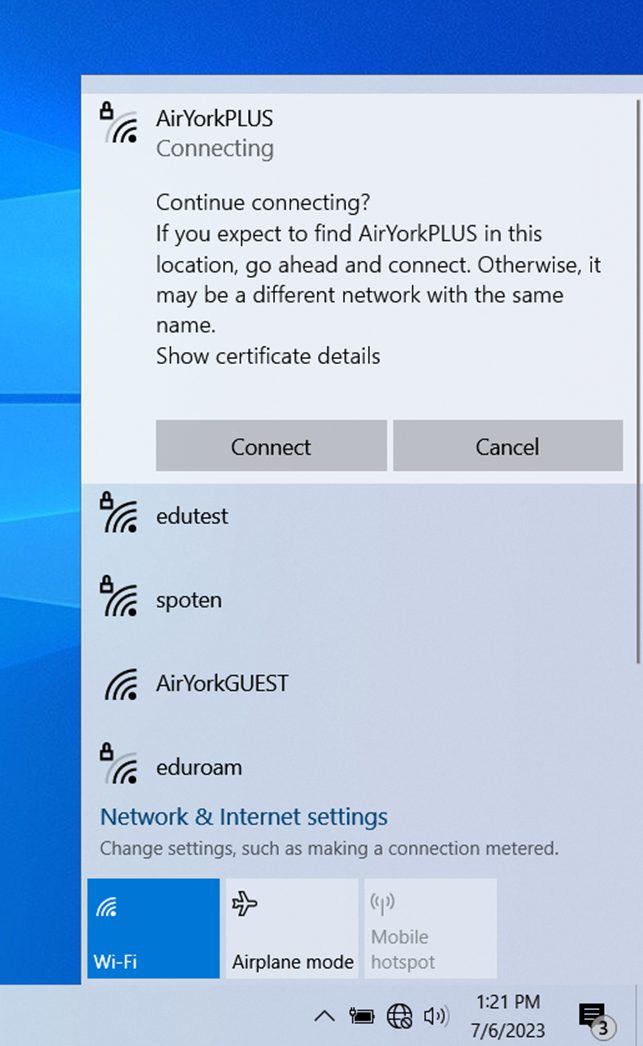
1. Click on the wireless icon in the task bar located at the bottom right of your screen.

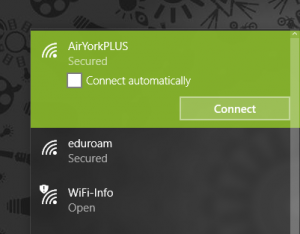
2. Select AirYorkPLUS from the list of available networks and click Connect.
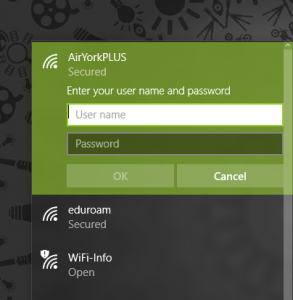
3. Enter your Passport York credentials as shown and click OK.
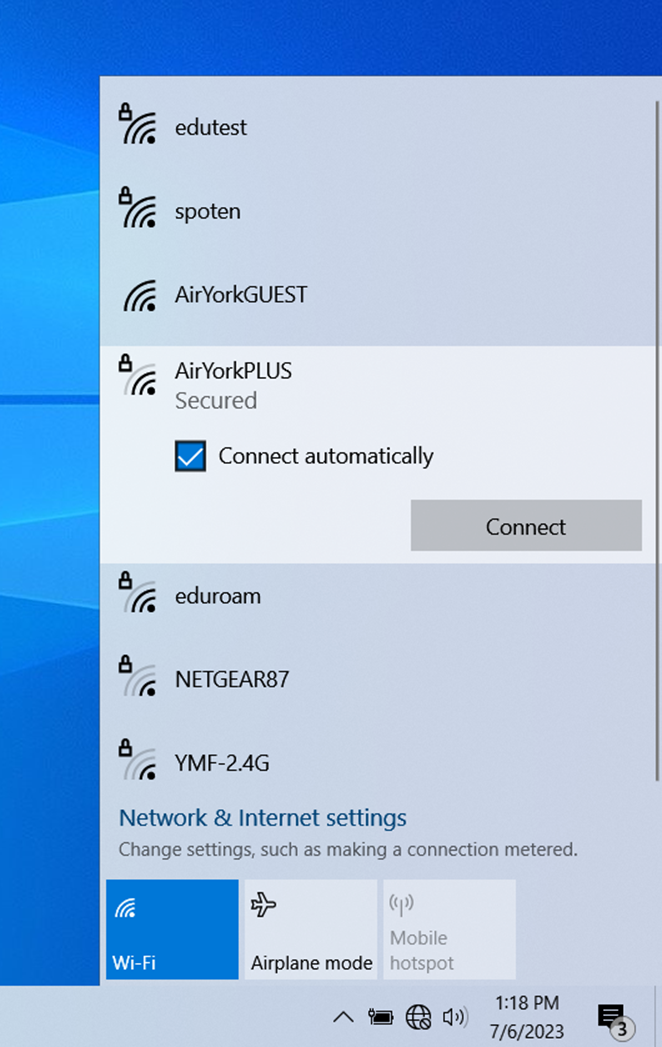
1. Click on the wireless icon (the globe or Wi-Fi symbol) in the taskbar located at the bottom right of your screen.
2. Select ‘AirYorkPLUS’ from the list of available networks and click ‘Connect’.
3. Enter your Passport York credentials as shown and click ‘OK’.
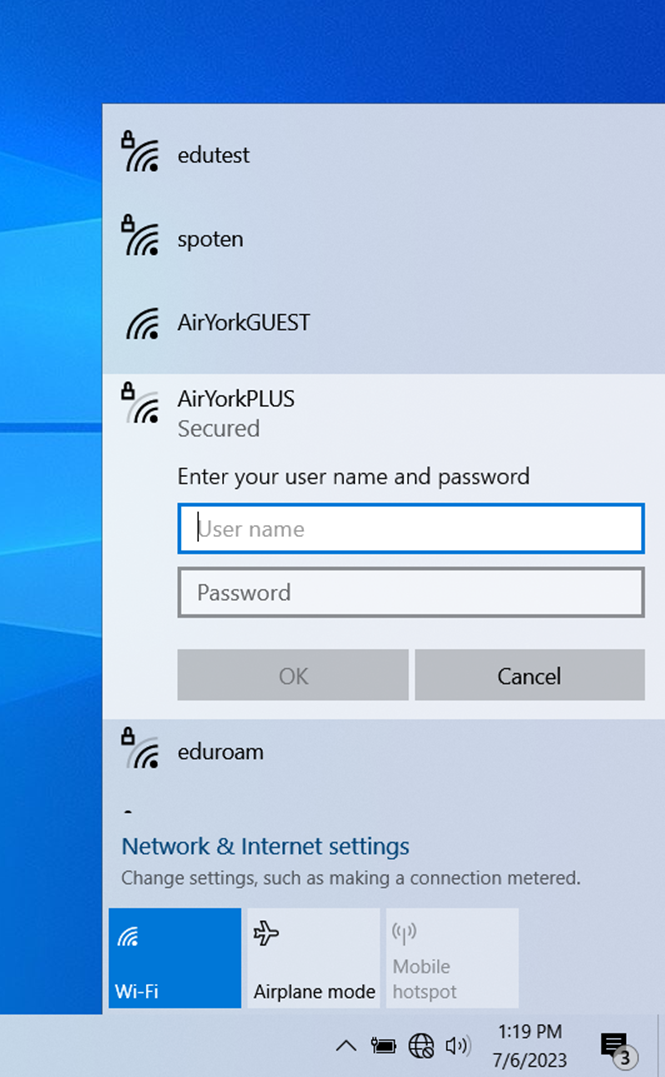
4. Click ‘Connect’ again to accept the certificate details.
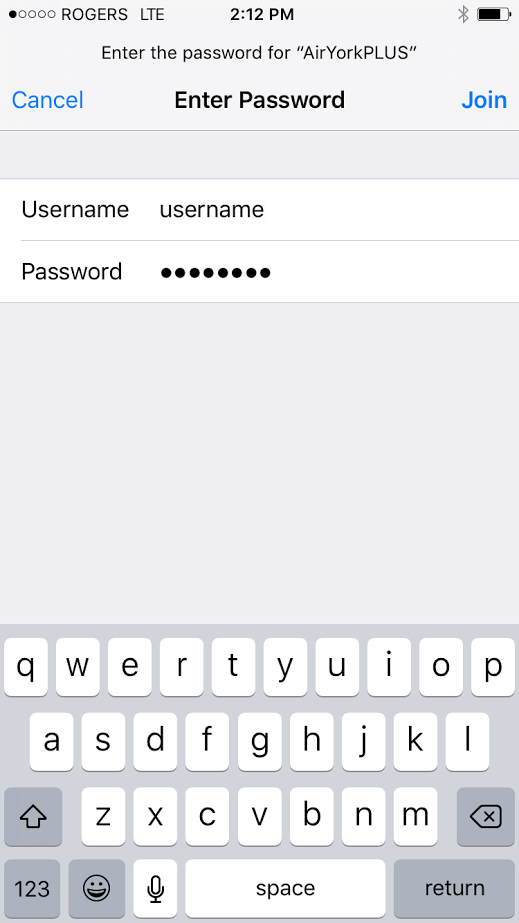
1. Click on the wireless icon in the task bar located at the top right corner of your screen and select AirYorkPLUS.
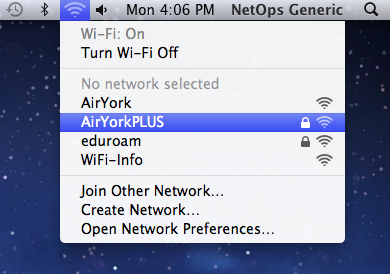
2. In the authentication window, enter your Passport York credentials and click Join.

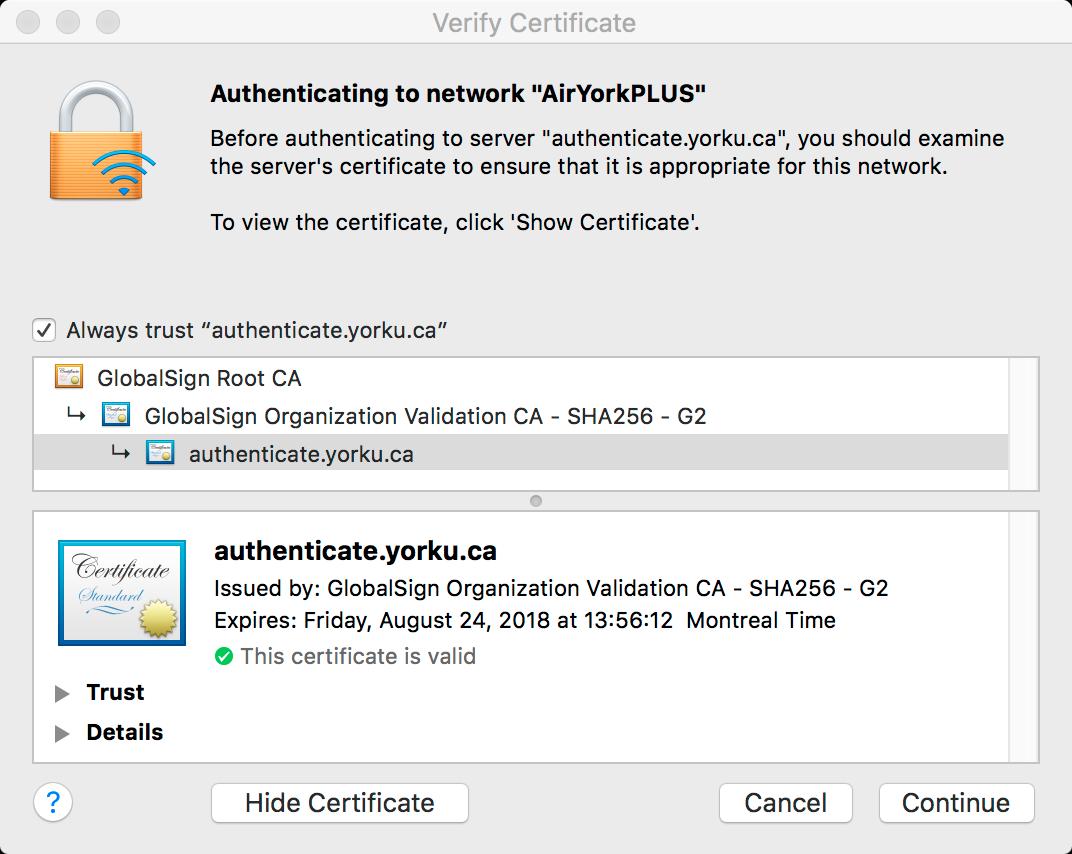
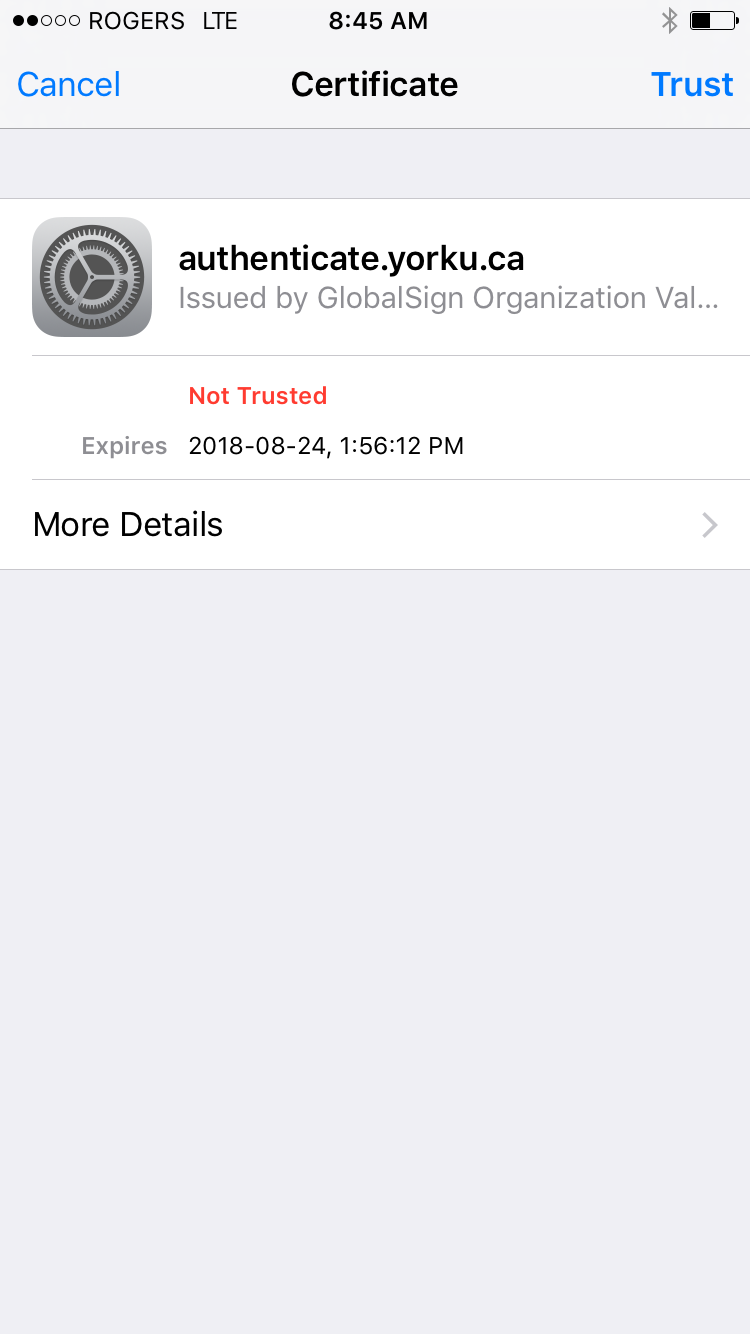
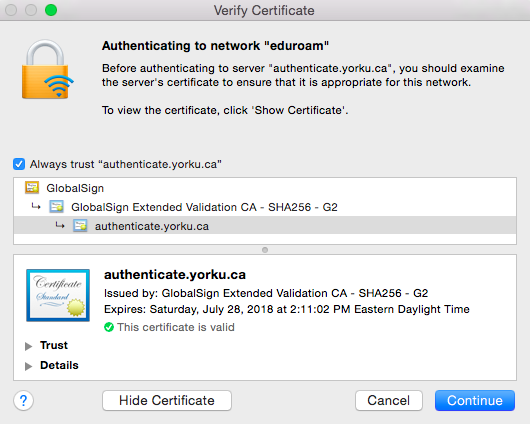
3. The Verify Certificate window will pop up, asking you to verify the authenticate.yorku.ca certificate for the AirYorkPLUS network is issued by GlobalSign Root CA; click Continue to connect.
1. From your device home screen, activate the menu button and select Settings:
2. Click on Wi-Fi.

3. Select AirYorkPLUS from the list of Wi-Fi networks.

4. You may need to enter the follow information as shown below:
– EAP method: PEAP
– Phase 2 authentication: MSCHAPV2
– CA Certificate: Do not validate
– Domain: yorku.ca ( If you do not see the domain field then ignore )
– Identity: your Passport York Username
– Password: your Passport York account password

5. Click Connect to complete the process.
1. Select Settings, then Wi-Fi.
2. Select AirYorkPLUS from the list of available networks.
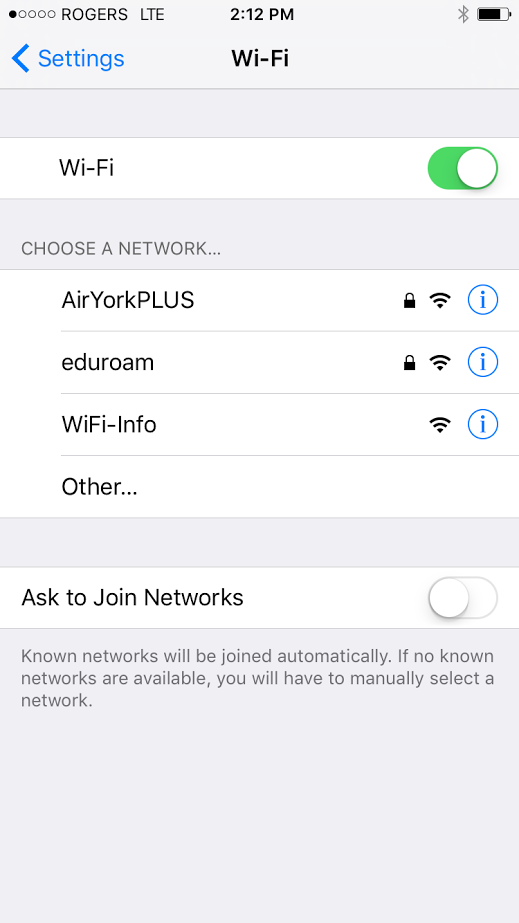
3. Enter your Passport York credentials and click Join.
4. Verify the certificate is for authenticate.yorku.ca and is issued by GlobalSign Organization Validation CA; if so, select Accept.
Overview
eduroam provides wireless Internet access to York community members and to visitors from eduroam-member institutions. eduroam provides improved security, performance, convenience and mobility. York Community members connected to eduroam are provided the same service as if they were connected to AirYorkPLUS, and it is available in all the same locations as AirYorkPLUS. A Wi-Fi client device which is configured to use eduroam does not also require AirYorkPLUS.
Who is it for?
At York, the eduroam service is available to visitors from an eduroam-participating institution. Current students, faculty and staff of York University may access eduroam while visiting other eduroam-participating institutions.
How do I access it?
At York, the eduroam service is available to visitors from an eduroam-participating institution. Current students, faculty and staff
- Check that the institution you will be visiting is an eduroam participant at eduroam Institution List .
- Configure your computer or wireless device & connect to eduroam wireless network:
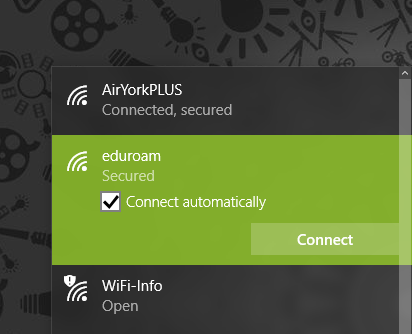
1. Click on the wireless icon in the task bar located at the bottom right of your screen.

2. Select eduroam from the list of available networks and click Connect.
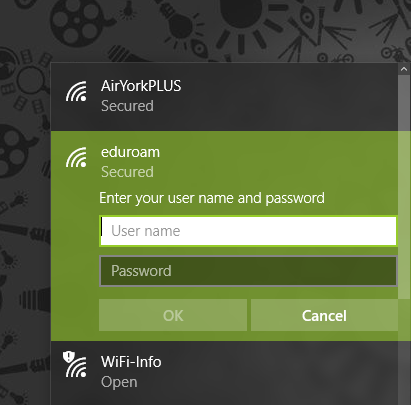
3. Enter your username in the form username@yorku.ca and your Passport York password and click OK.
1. Click on the wireless icon in the task bar located at the top right corner of your screen and select eduroam.
2. In the authentication window, enter the following and click Join:
– Username: PPYusername@yorku.ca
– Password: your FAS account password
3. The Verify Certificate window will pop up, asking you to verify the certificate for server eduroam.yorku.ca and issued by GlobalSign Extended Validation CA. If so, click Continue.
4. You will then be prompted for your machine’s admin password in order to add this certificate to your Certificate Trust Settings; click Update Settings.
5. You should now be connected to the eduroam wireless network.
**Please note Android devices vary and the eduroam setup process may look slightly different depending on the device. Screen shots are dependent on the version of Android that the user has.
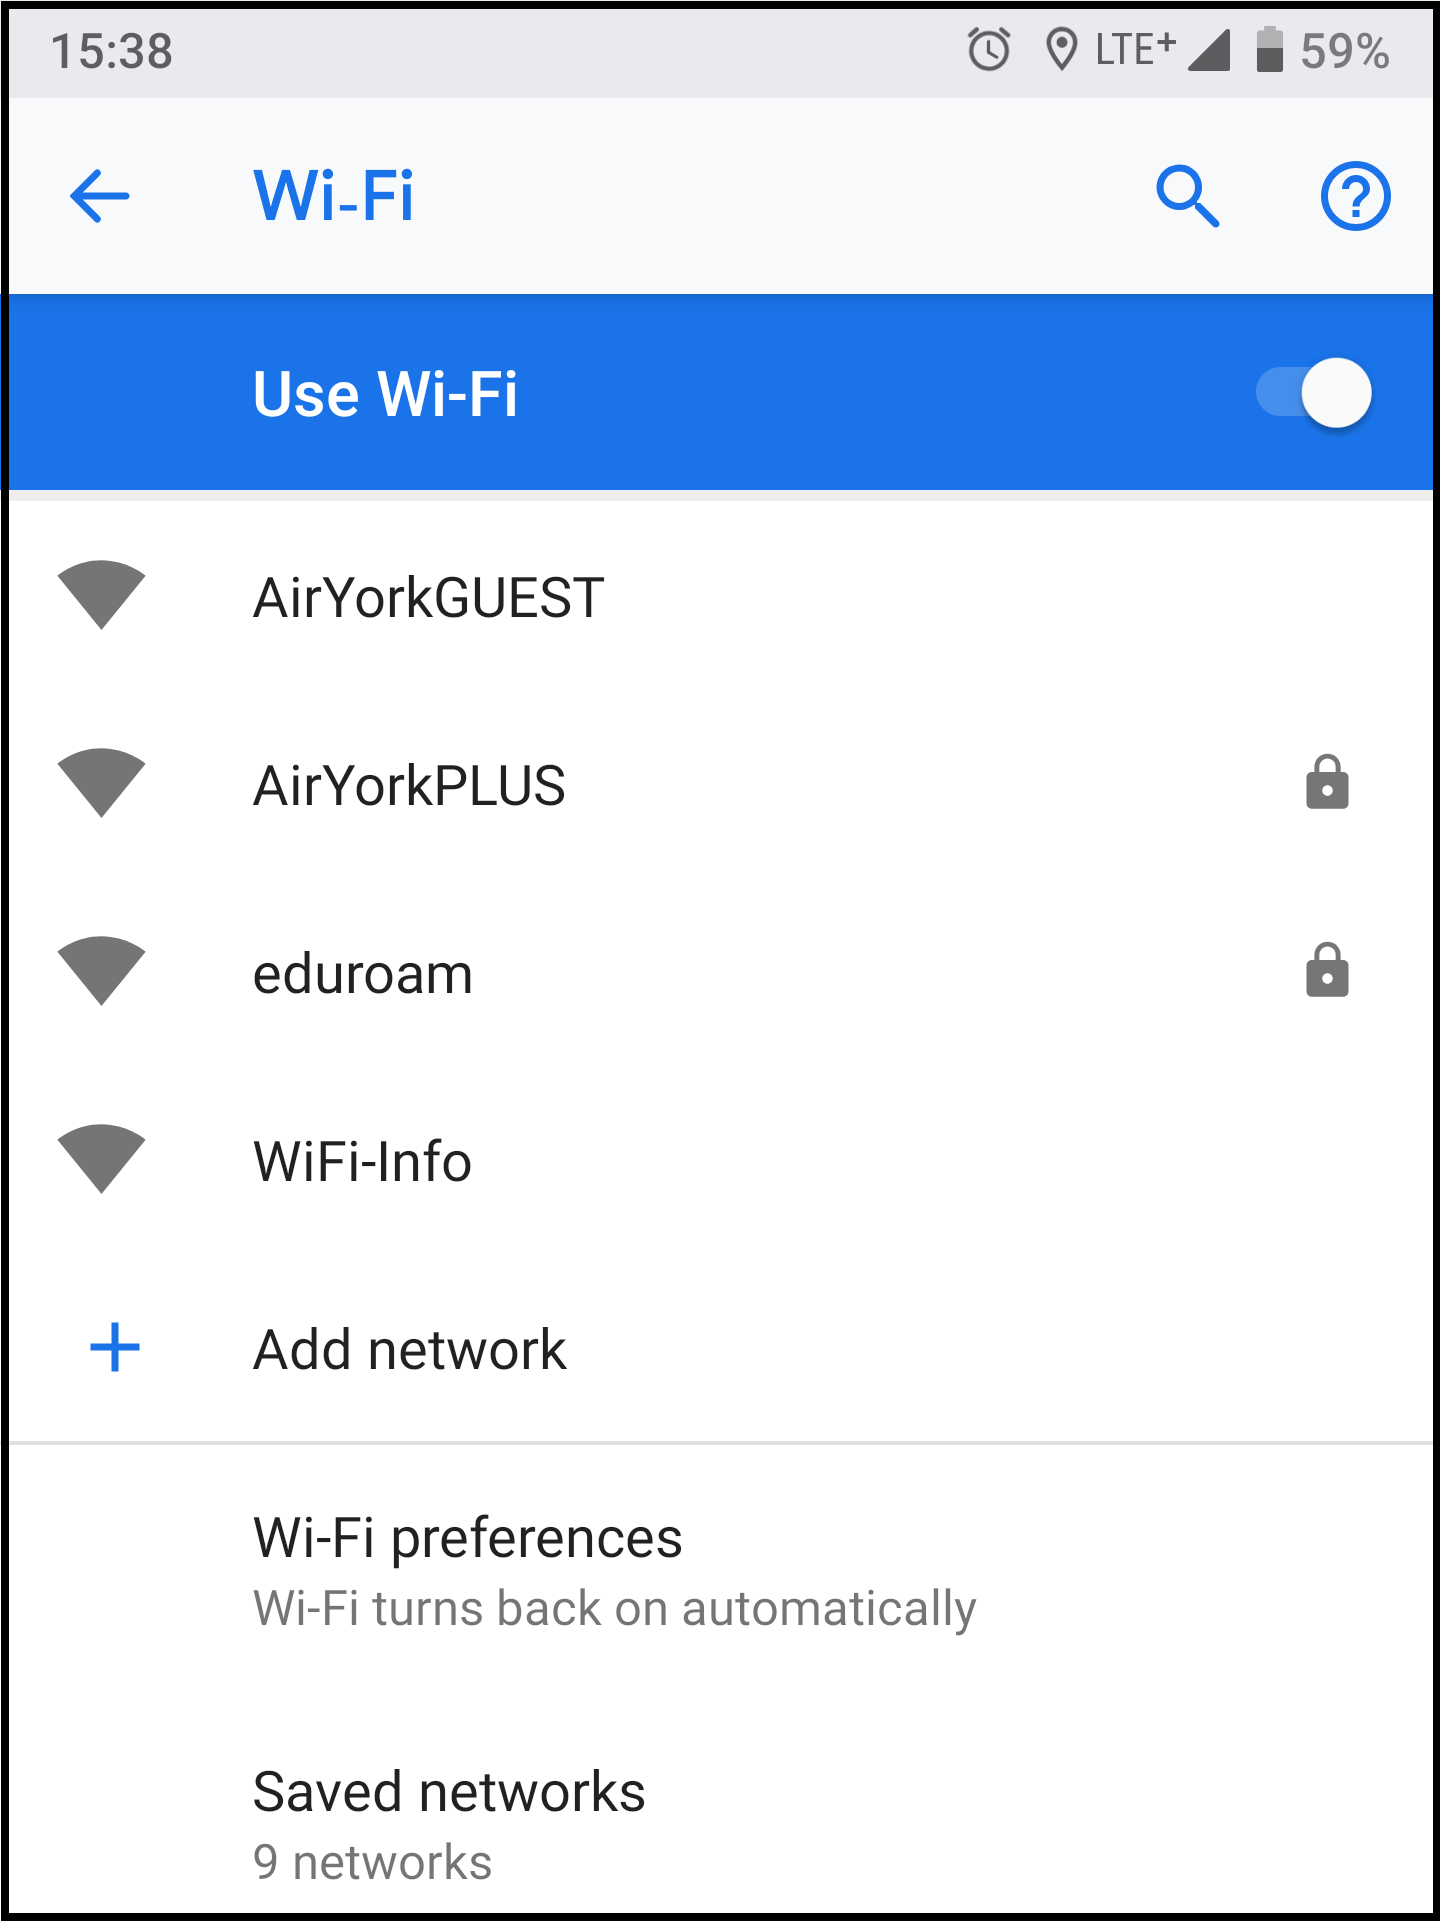
1. From the home screen search for Settings.

2. Find and tap on Settings (Fig.2) – you may have to swipe several screens to the right to find it.

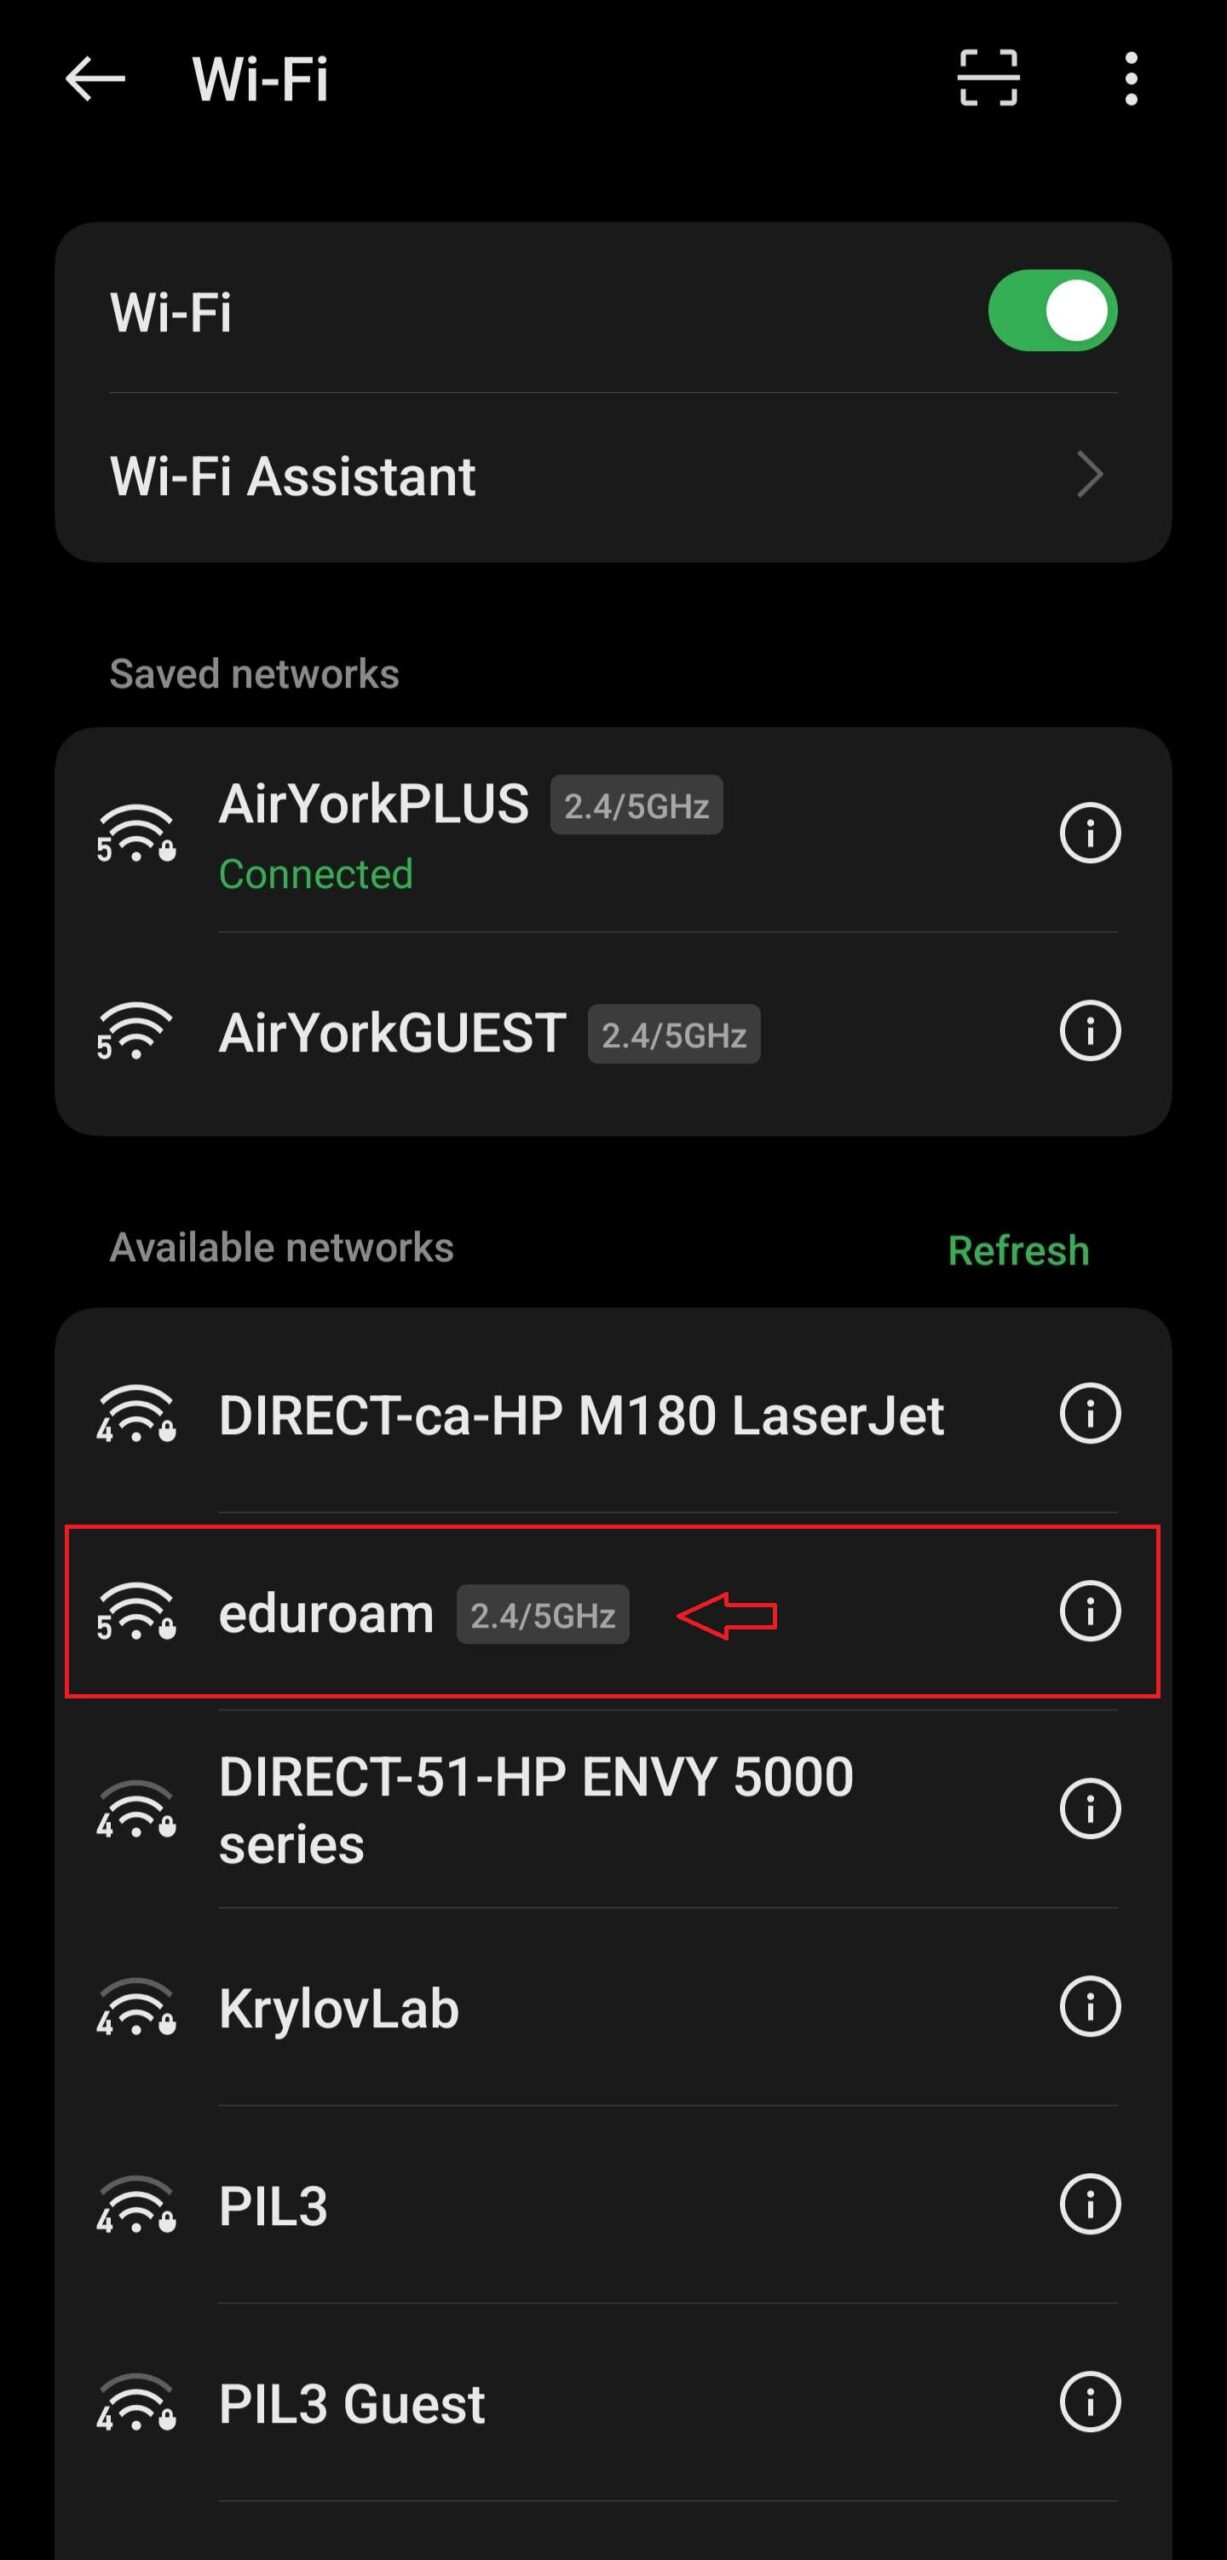
3. In the Wireless & Networks section (Fig.3) select Wi-Fi
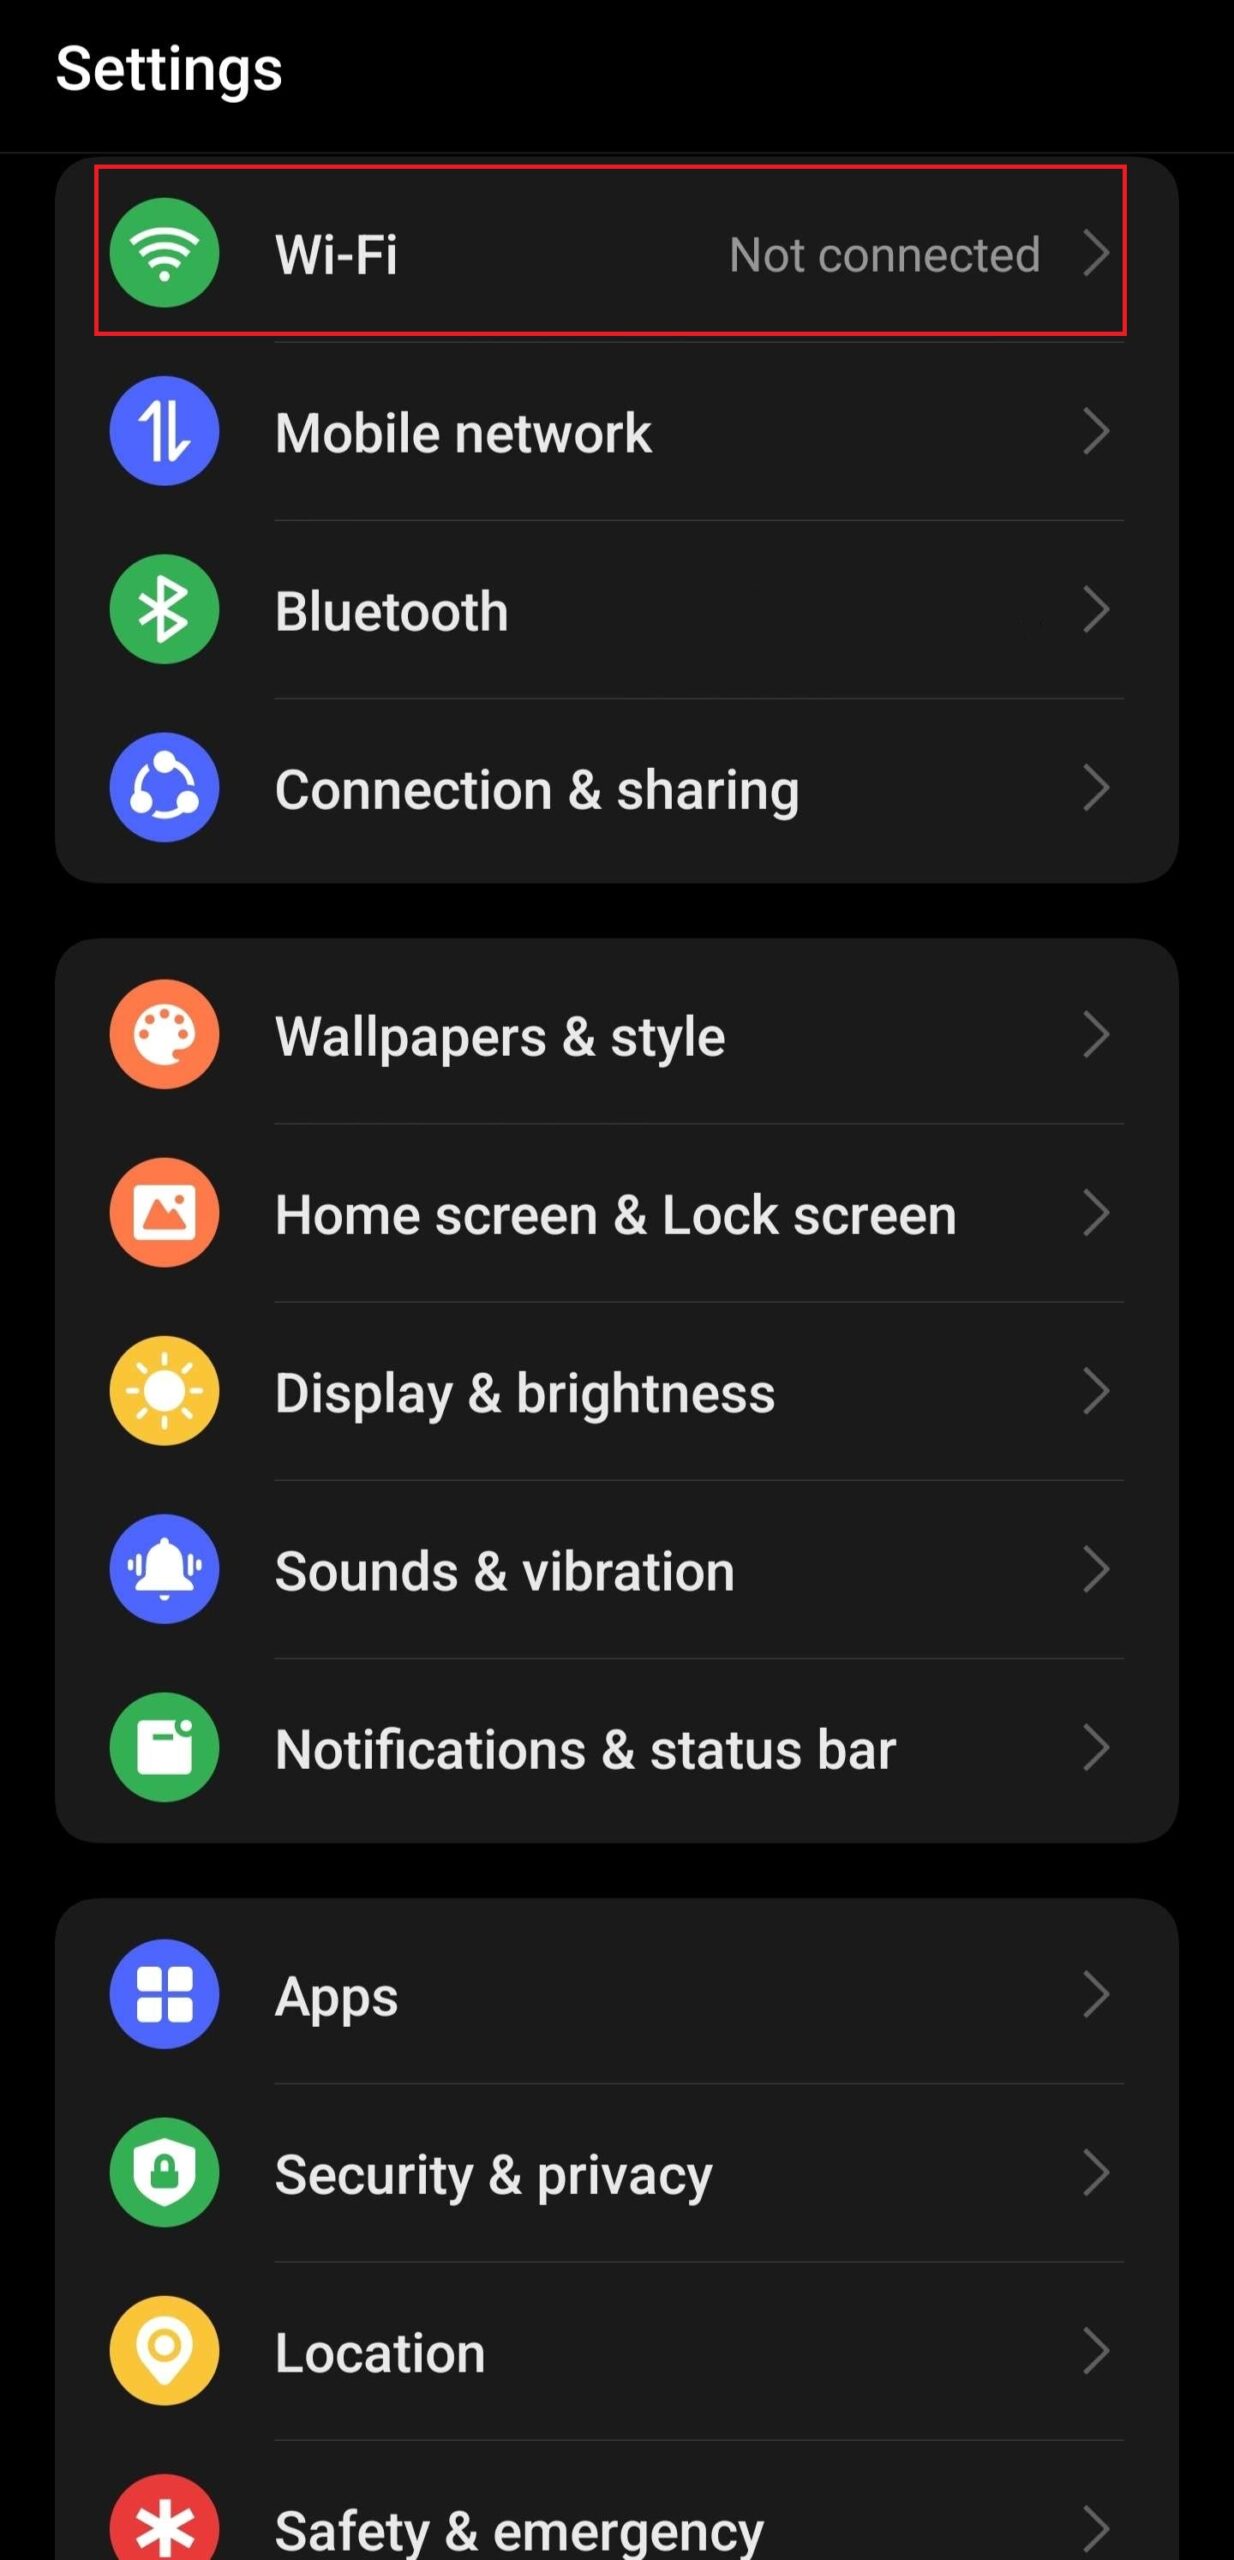
4. The Wi-Fi screen will open and display a list of available networks. Select eduroam
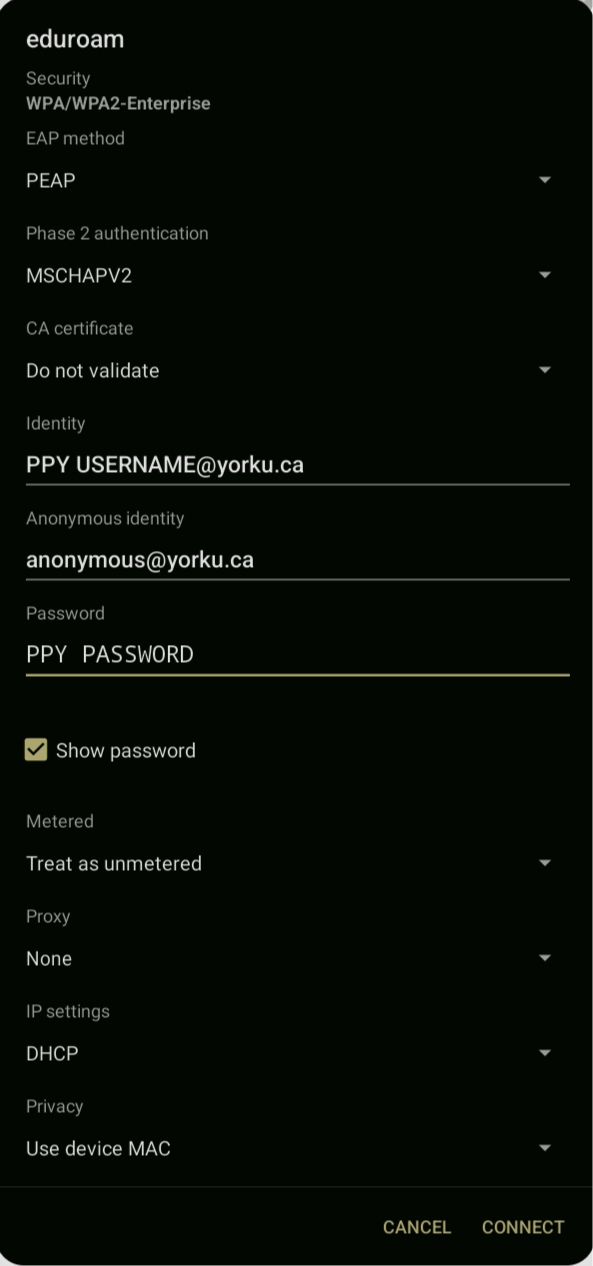
5. You will be prompted to sign in to the wireless network. Enter the following details in the settings menu (Fig.5):
EAP method: PEAP
Phase-2 authentication: MSCHAPV2
CA certificate: None
Domain: yorku.ca
Identity: Your Passport York username@yorku.ca
Anonymous identity: anonymous@yorku.ca
Password: your Passport York password
6. You should now be connected to the eduroam network.
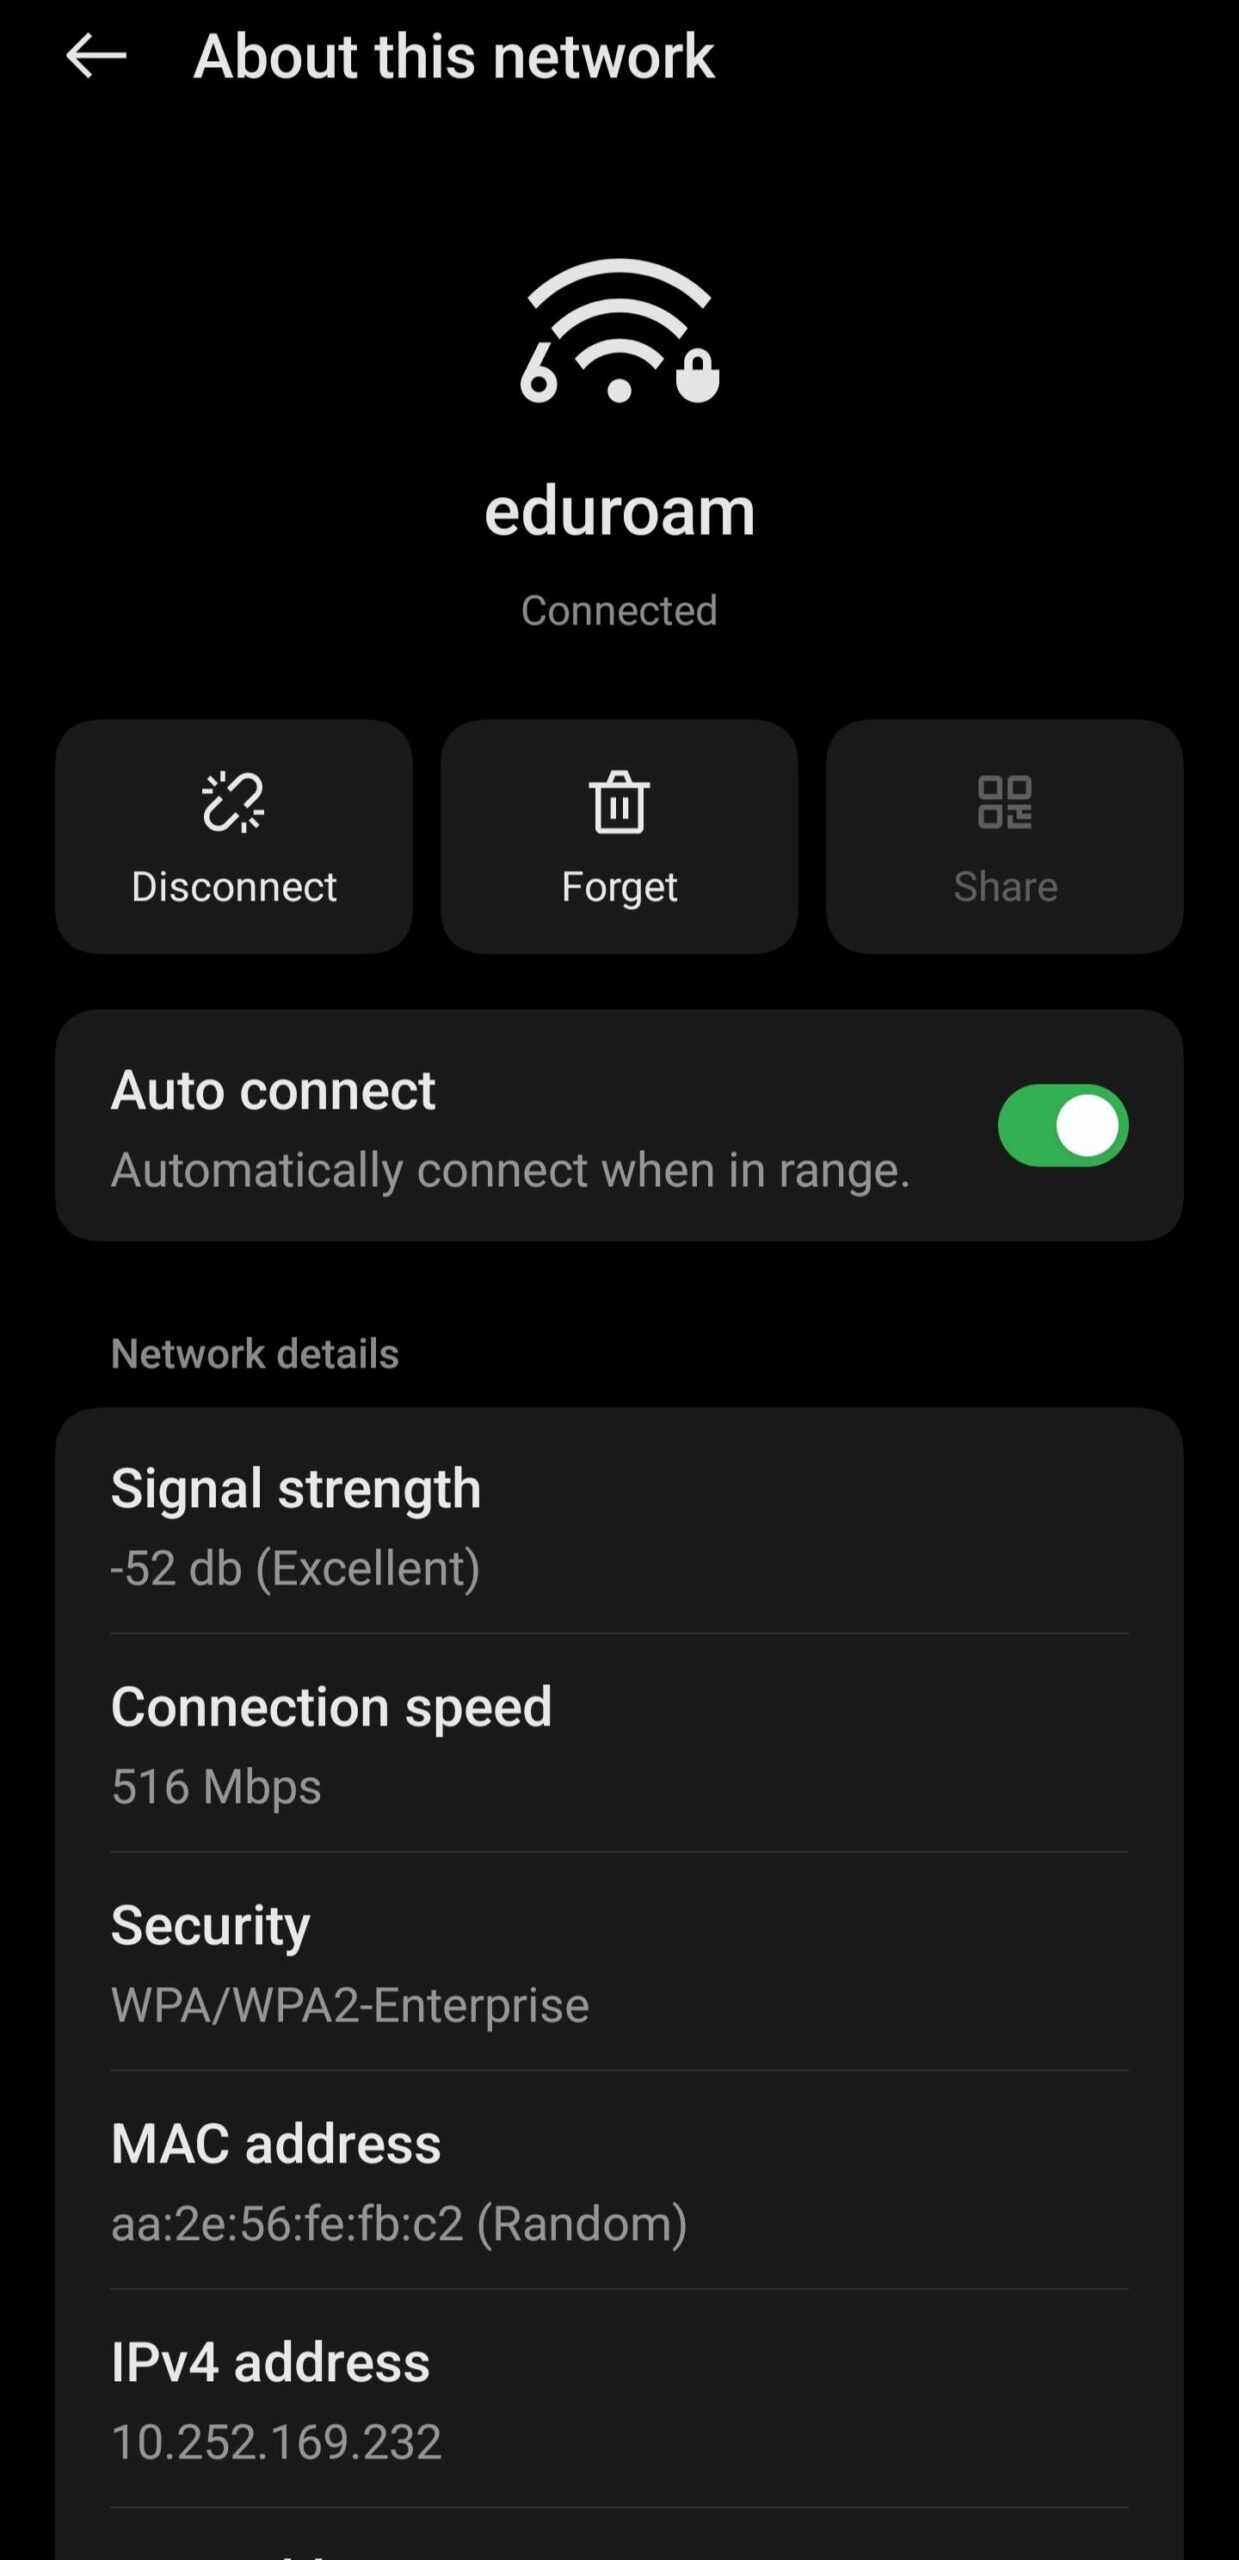
7. Press the Home key underneath the screen to exit Settings and return the main screen.
**Please note for a more stable connection users can change the field under Privacy heading to ‘Use device MAC’. This setting may be available under Advanced Options.
1. From your device home screen, activate the menu button and select Settings:
2. Click on Wi-Fi

3. Select eduroam from the list of Wi-Fi networks.
4. You may need to enter the follow information as shown below:
– EAP method: PEAP
– Phase 2 authentication: MSCHAPV2
– CA Certificate: Do not validate
– Identity: PPYusername@yorku.ca
– Password: your FAS account password
5. Click Connect to complete the process.
1. Select Settings, then Wi-Fi.
2. Select eduroam.
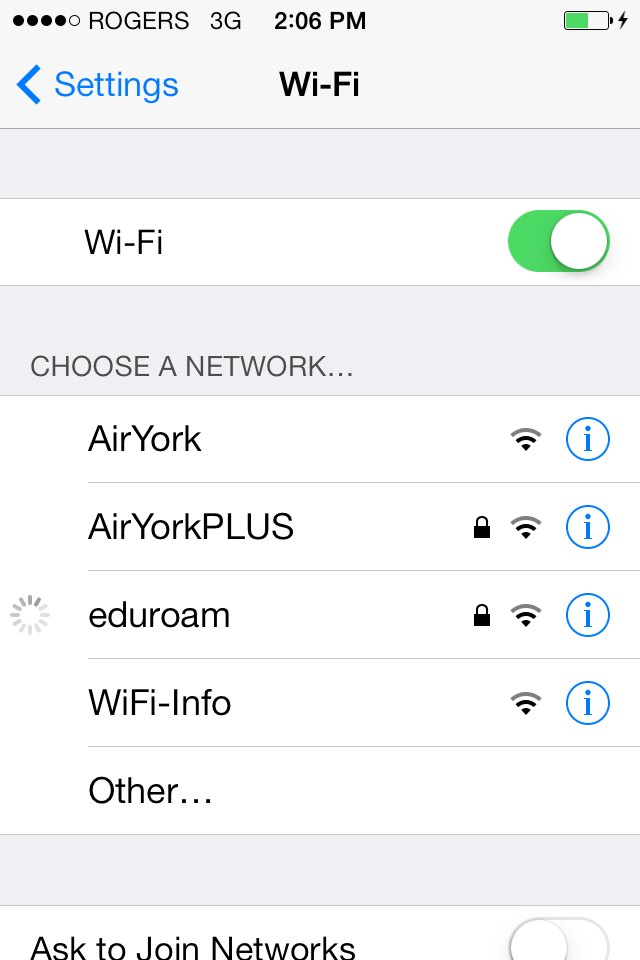
3. Enter the following, and click Join:
– Username: PPYUsername@yorku.ca
– Password: your Passport York password
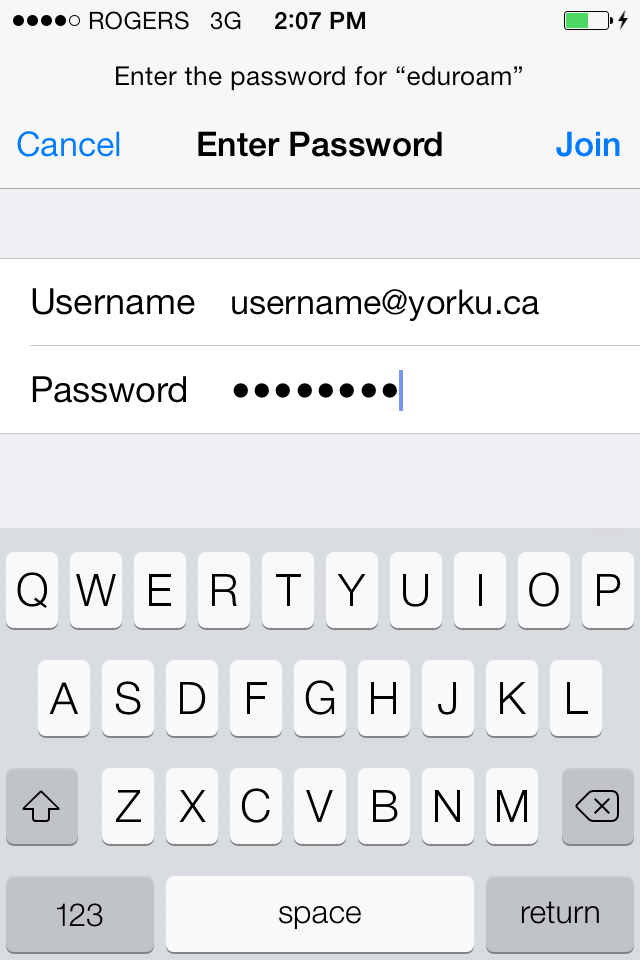
4. Verify the certificate is for eduroam.yorku.ca and is issued by GlobalSign Organization Validation CA. If so, select Accept.

5. You should now be connected to the eduroam wireless network.
Overview
AirYorkGUEST provides casual visitors to the University with Wi-Fi Internet access. AirYorkGUEST also provides Wi-Fi network access to devices which do not have a web browser (e.g. barcode scanners, mobile printers, etc.). AirYorkGUEST is available in all the same locations as AirYorkPLUS.
NOTE
- Maximum duration of a login session is 8 hours. Upon reaching this session time limit, the connection to the AirYorkGUEST network will be terminated without warning. However, you can register again for another 8 hour session.
- **Please note AirYorkGUEST cannot be used by the community that normally uses either eduroam or AirYorkPLUS.
Who is it for?
AirYorkGUEST is for people that come on to campus and need internet service in a guest capacity, similar to being at a public library, coffee shop or a fast food restaurant.
How do I access it?
1. In the list of available wireless networks, select AirYorkGUEST.
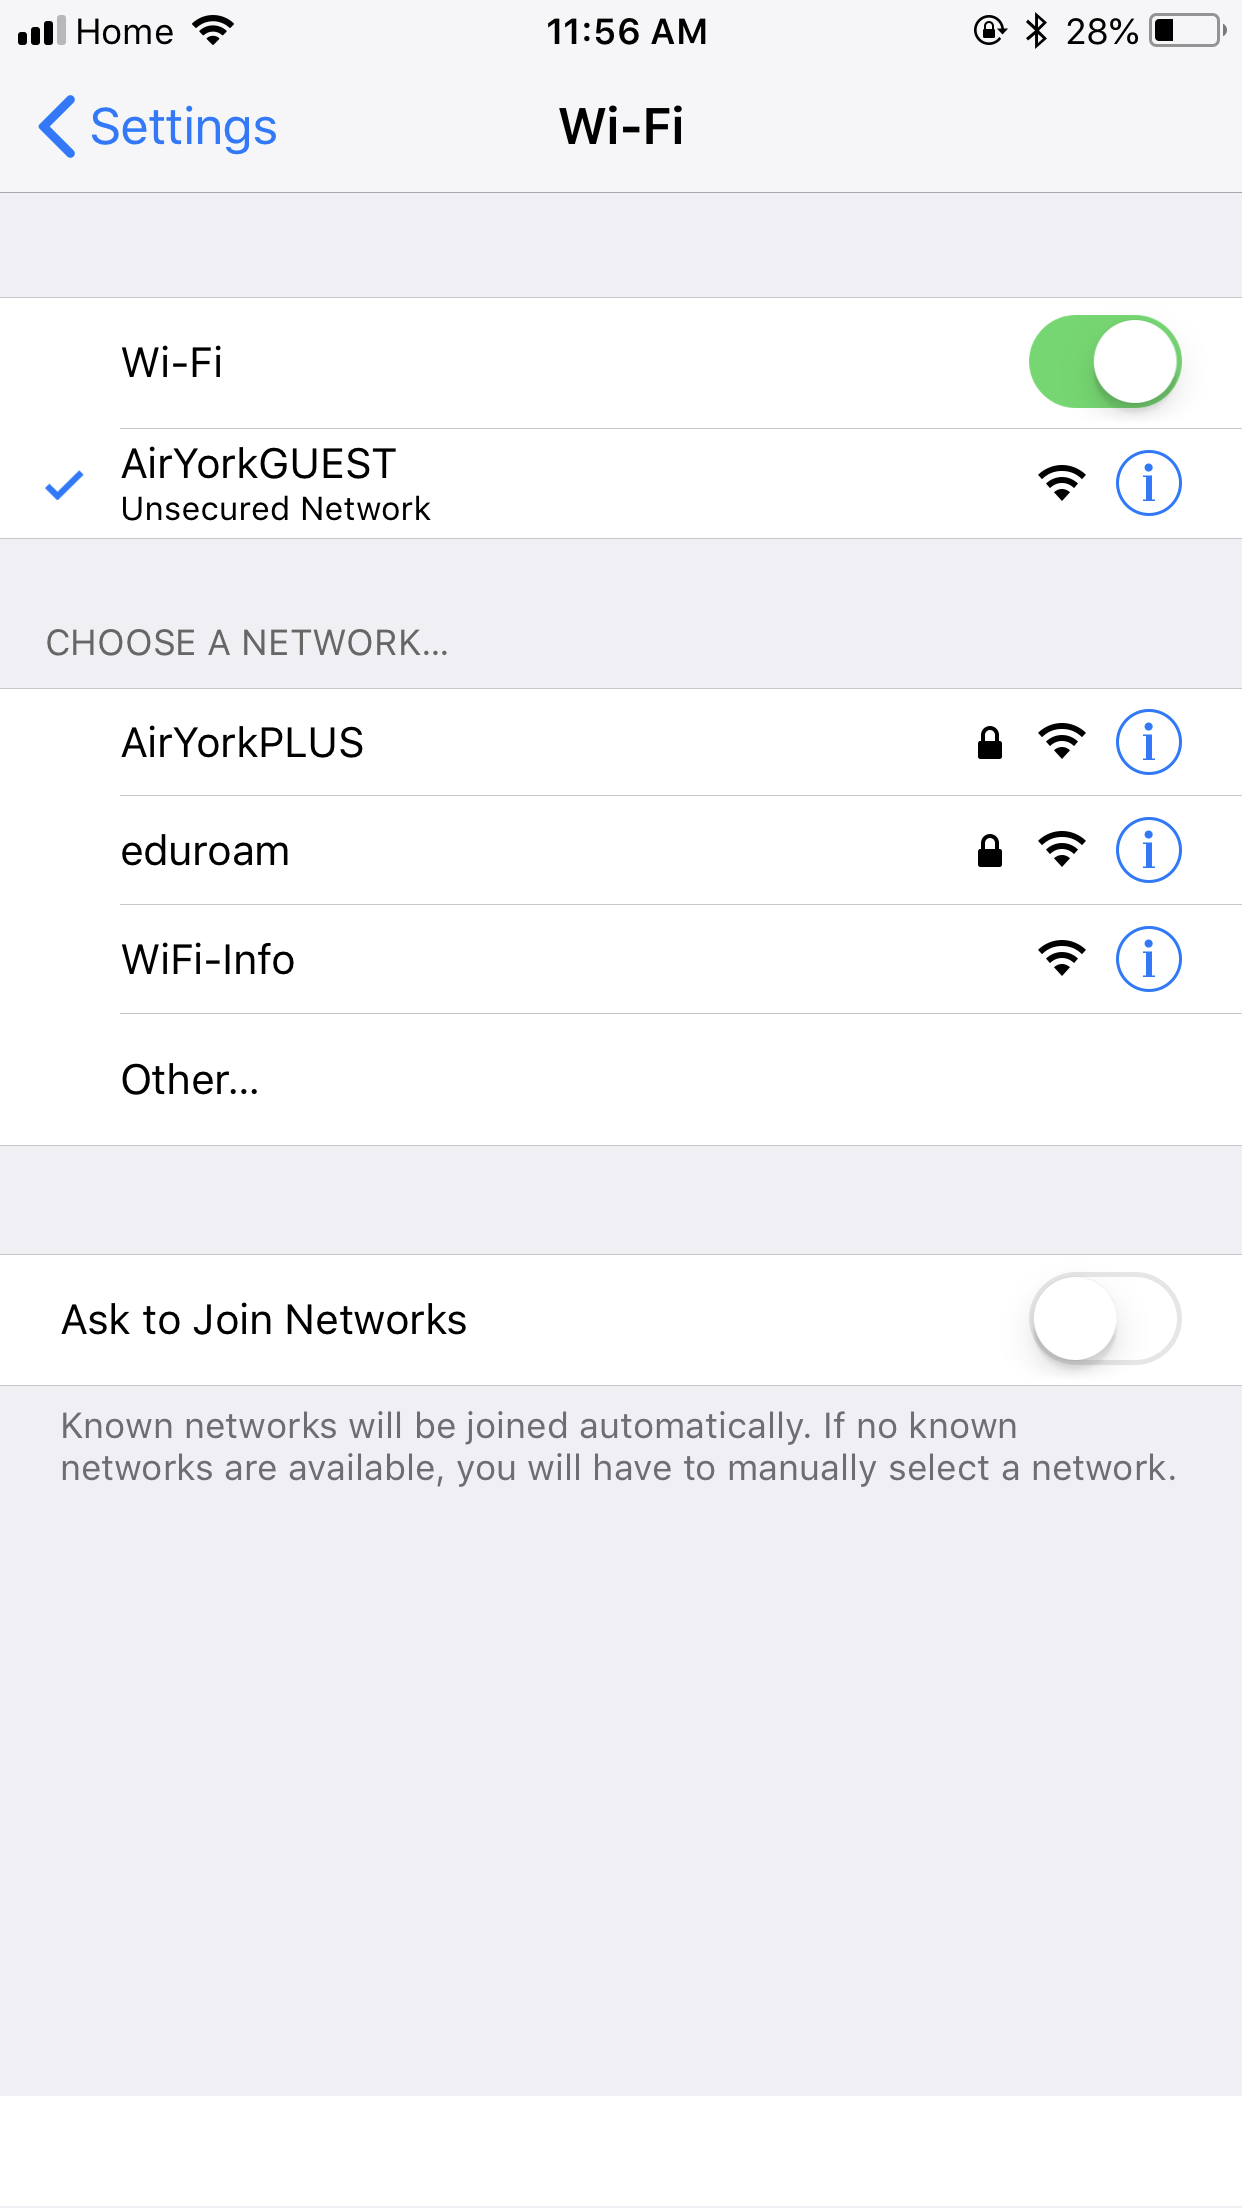
2. Once you get redirected to the AirYorkGUEST splash screen, enter your information.
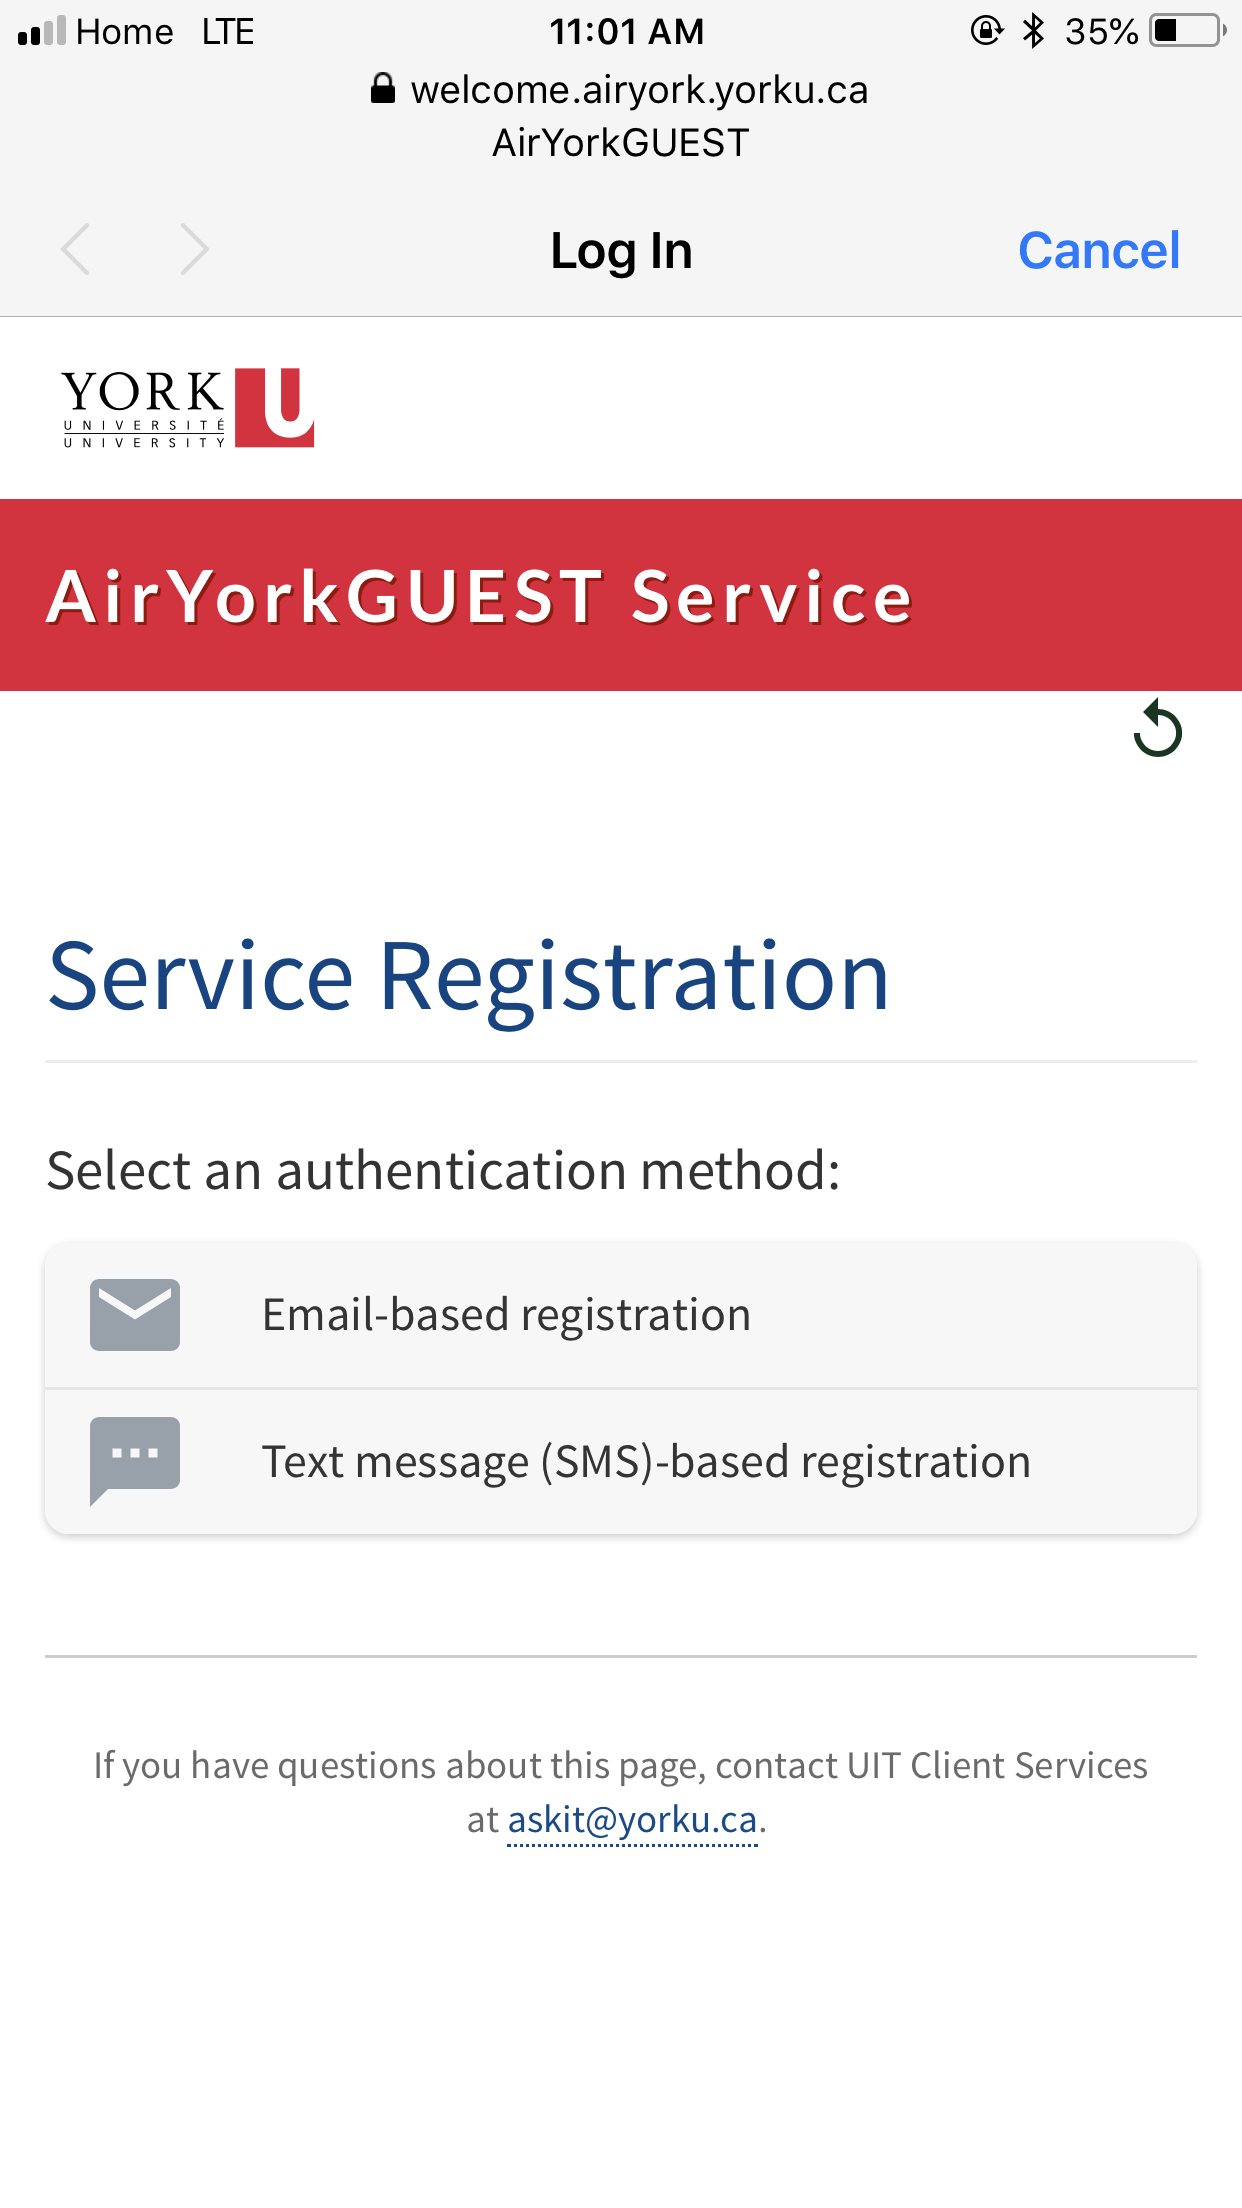
3. You will be redirected to the AirYorkGUEST Service Registration Page. Select an authentication method – email or sms and accept the terms and conditions.
Please note that if you provide your email address then you will get 10 mins of internet access to check your mail and click on the validation link.
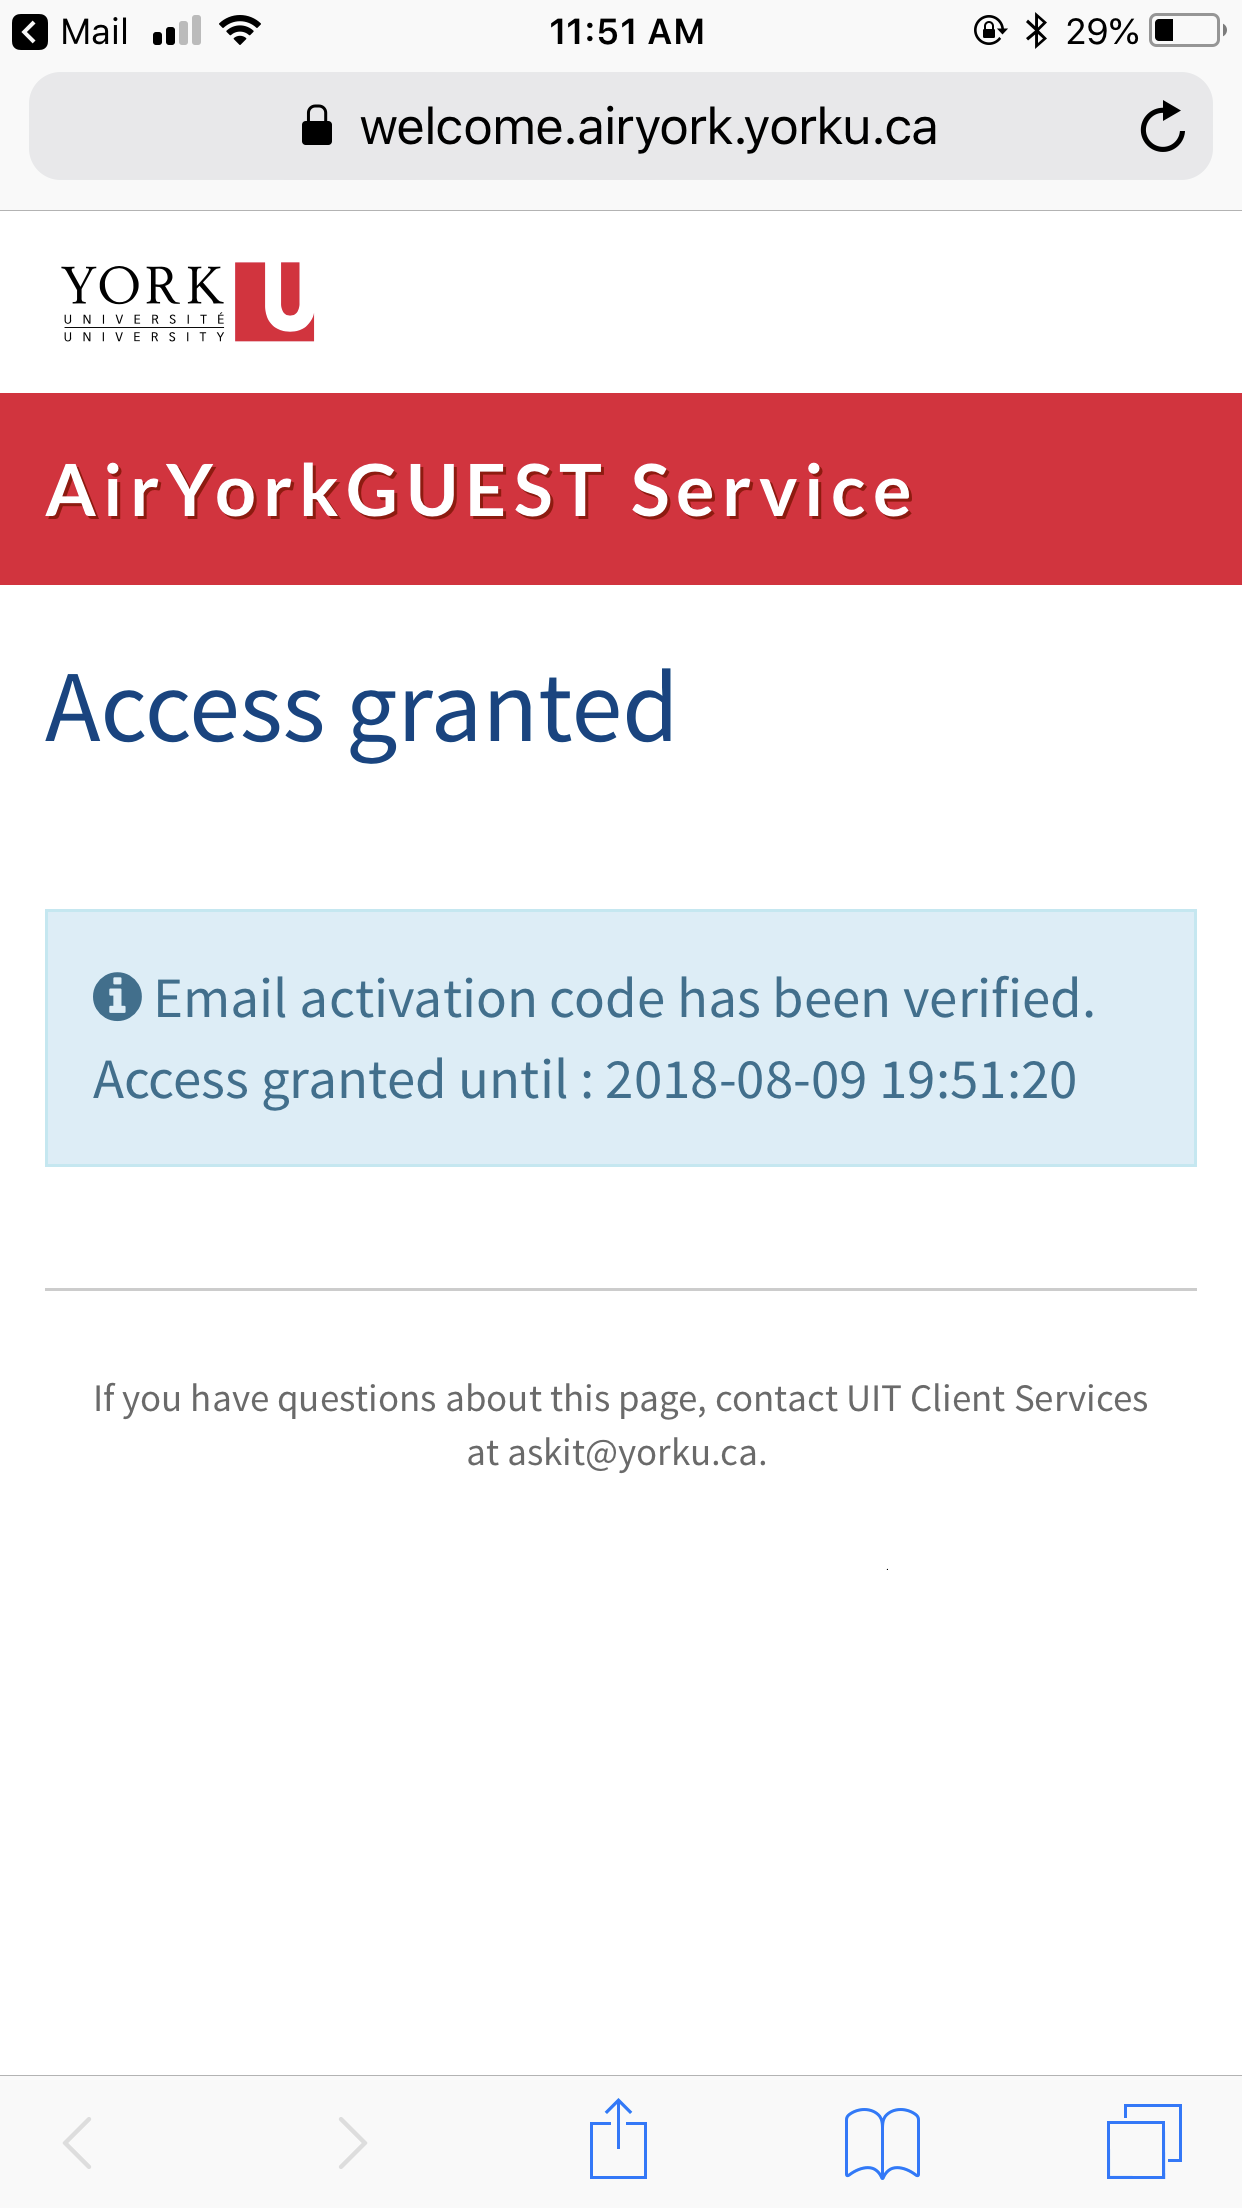
4. Receive and confirm the the verification message and start using the Internet.
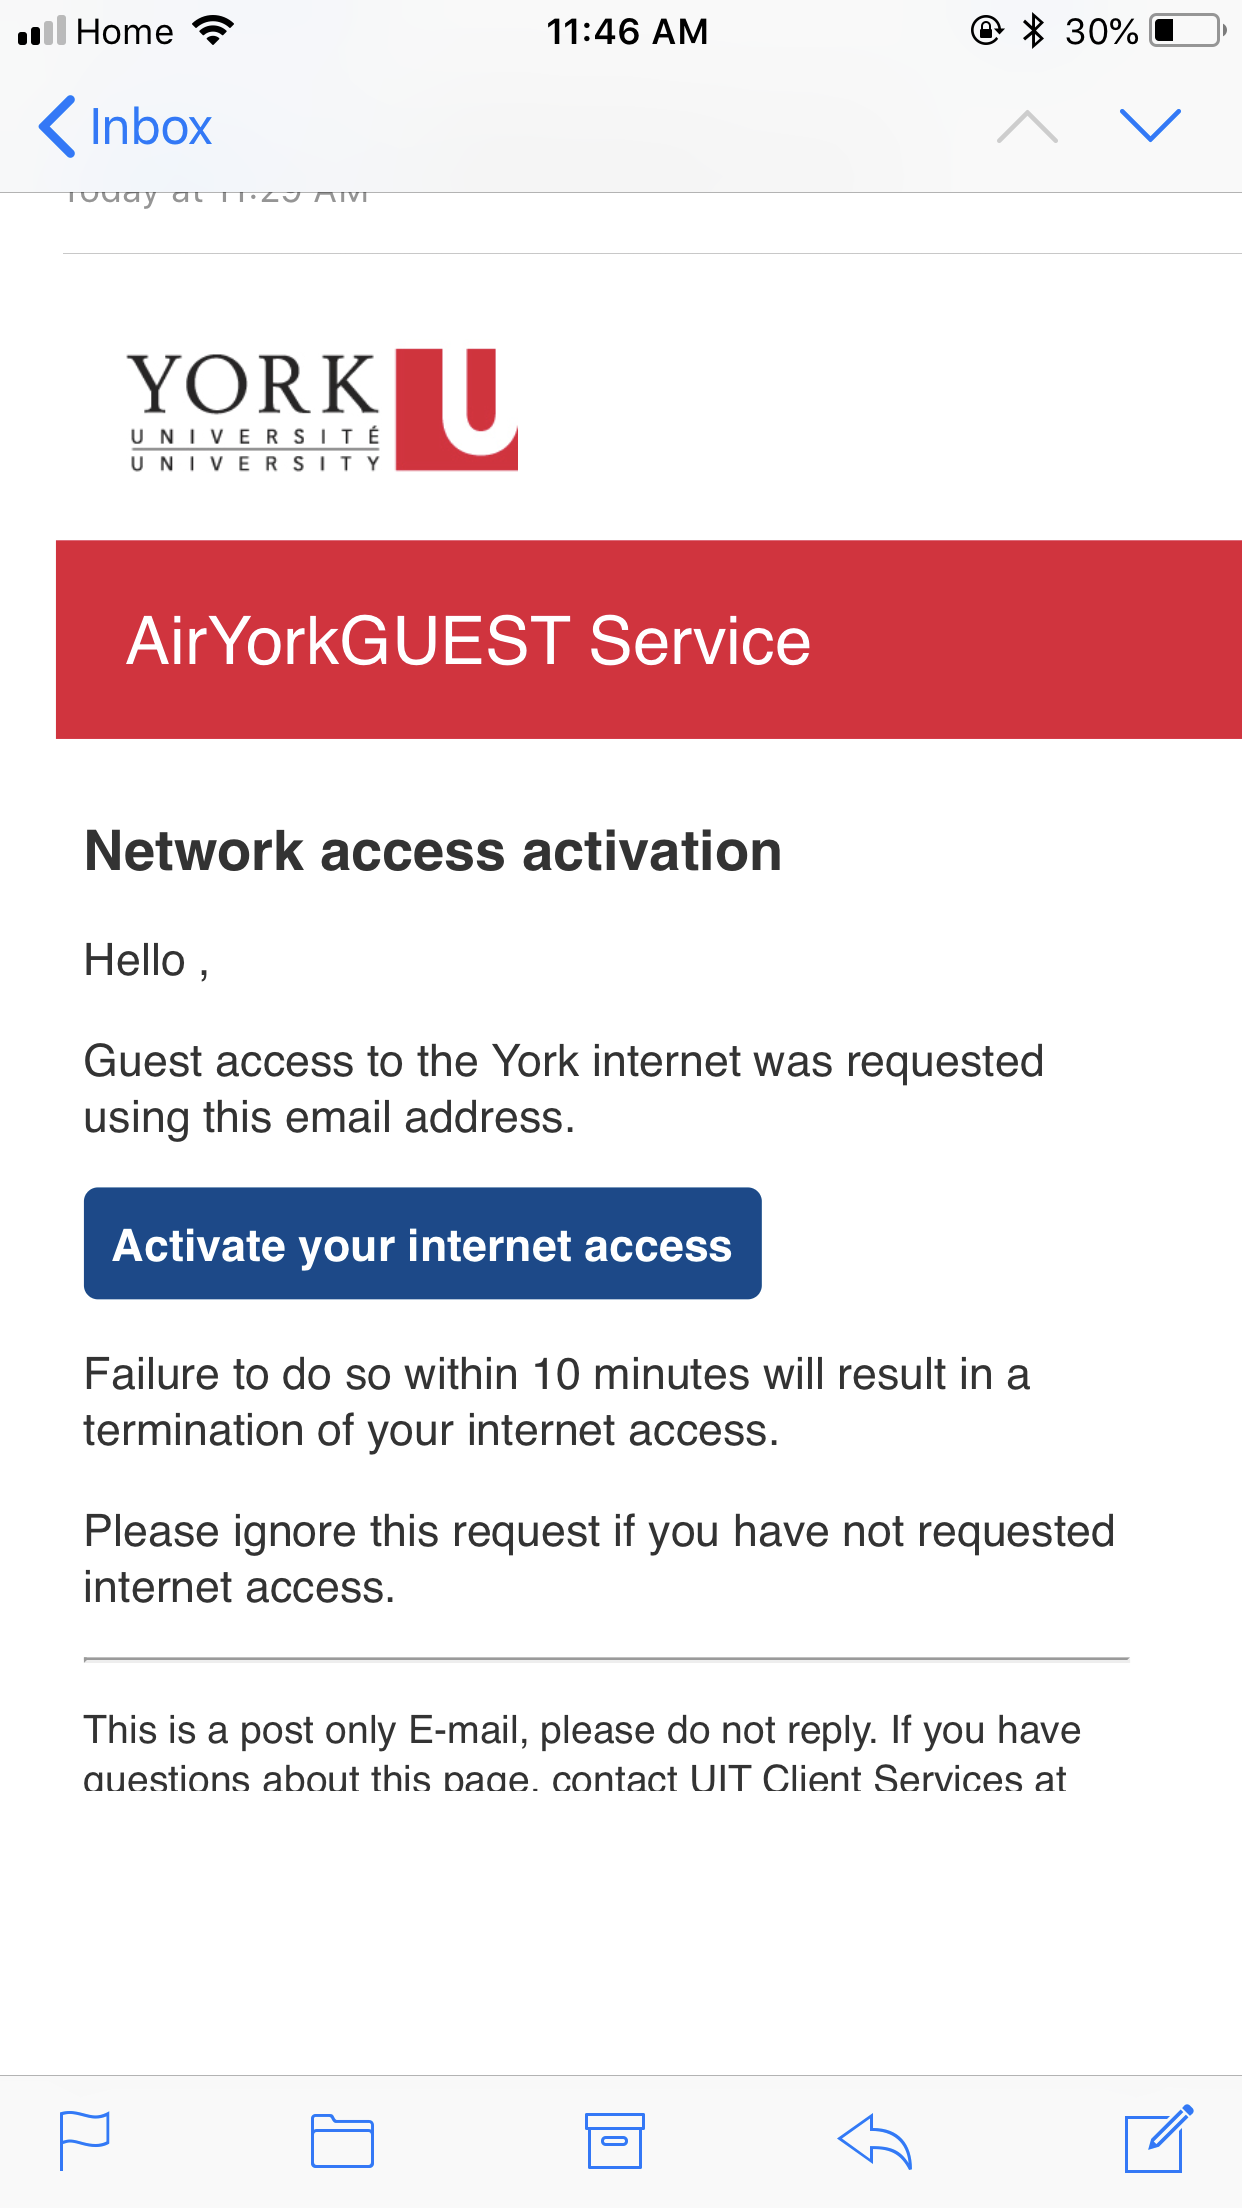
5. Click on the validation link on the email you received to start accessing the internet or enter the verification code you received via SMS in the Service Registration Website.
Overview:
Wired network at York is accessed by direct connection, typically using a dynamic IP address service known as Dynamic Host Configuration Protocol (DHCP).
How do I access it?
- Direct connection to the York network intended for specific hardware; no login required.
- Request LAN Drops from your local IT Support Group.
- If you do not have an IT Support Group, submit a request.
- LAN Drop ethernet jacks are usually blue.
- To apply for an IP address please submit the online IP address request form.
**Please note wired access at York typically just works. If you need help, submit a Service Request.
Overview
Secure remote access uses VPN (Virtual Private Network) technology to create a secure link between your device and the York network. This service is strongly recommended when connecting from any non-secure wireless network, such as AirYorkGUEST or public hotspots.
How do I access it?
**Please note the Ivanti Secure Access client download and setup steps are done only ONCE.
Download, install and configure an appropriate client as per table below:
Steps to Download Ivanti Secure:
1. Download Ivanti Secure Installer (64 Bit) or Ivanti Secure Installer (32 Bit).
- Pulse Secure Version 9.1r15.4-b17585* (32-Bit)
- Pulse Secure Version 9.1r15.4-b17585* (64-Bit)
- Pulse Secure Version 9.1r15.2-b17113 (32-Bit)
- Pulse Secure Version 9.1r15.2-b17113 (64-Bit)
- Ivanti Secure Version 22.6r1.2-b27593* (32-Bit)
- Ivanti Secure Version 22.6r1.2-b27593* (64-Bit)
- Ivanti Secure Version 22.6r1.2-b27593* (ARM 64-Bit)
- Ivanti Secure Version 22.3r2.0-b19787 (32-Bit)
- Ivanti Secure Version 22.3r2.0-b19787 (64-Bit)
* Latest Version
Please visit How can I tell if my computer is running a 32-bit or a 64-bit version of Windows? if you need to determine if your Windows OS is 64 bit or 32 bit.
2. When you start the download of the Ivanti Secure installer file, you will be first prompted to log in to York University Computing Downloads using your Passport York credentials.
3. Depending on your browser, you might be able to choose Run to begin the installation or you will have to Save the installer file first. If you have to save the file, it will appear under your downloads (PulseSecure.xNN.msi).

4. Click on the file name in your downloads and/or Run the file. The InstallShield Wizard will open. Click next and install. You might have to click Yes to allow the installation on your computer user account. Click finish to complete the installation.
5. Once you finish, the wizard screen disappears. The Ivanti icon has been added to your system tray.
6. Log out from York University Computing Downloads and proceed with Ivanti setup using the icon in your system tray.
Steps to Configure Ivanti Secure Access Client:
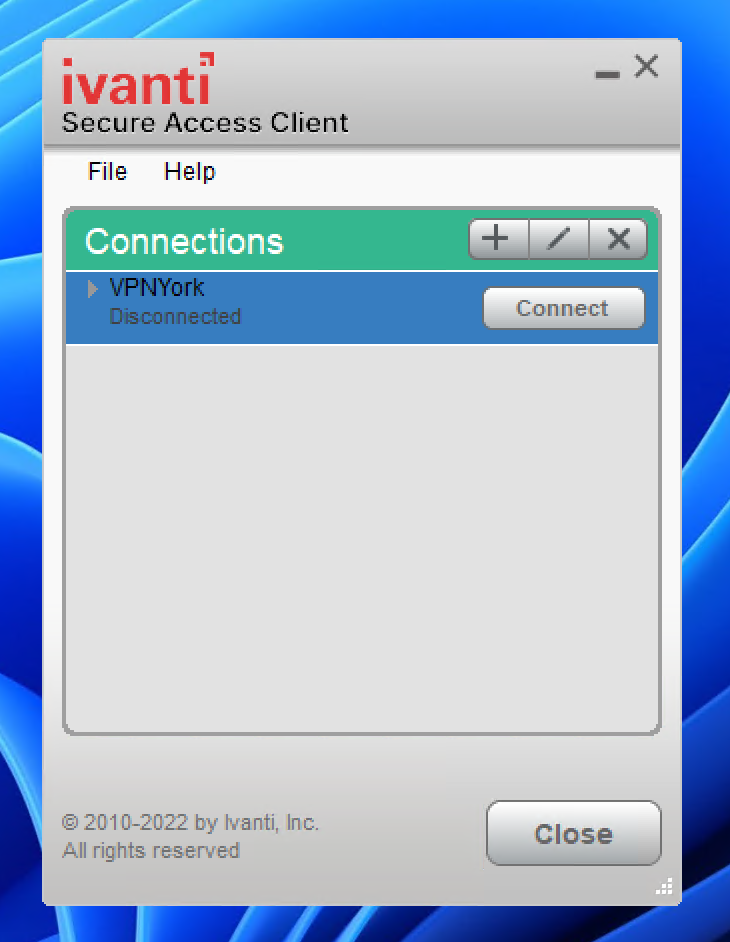
1. Confirm that Ivanti Secure Access Client™ is running by clicking on the Ivanti Secure Access Client™ icon in the system tray:
2. After clicking on the Ivanti Secure Access Client™ Icon in the system tray the Ivanti Secure Access Client™ window is presented as follows:
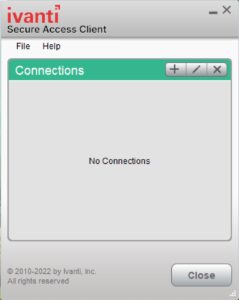
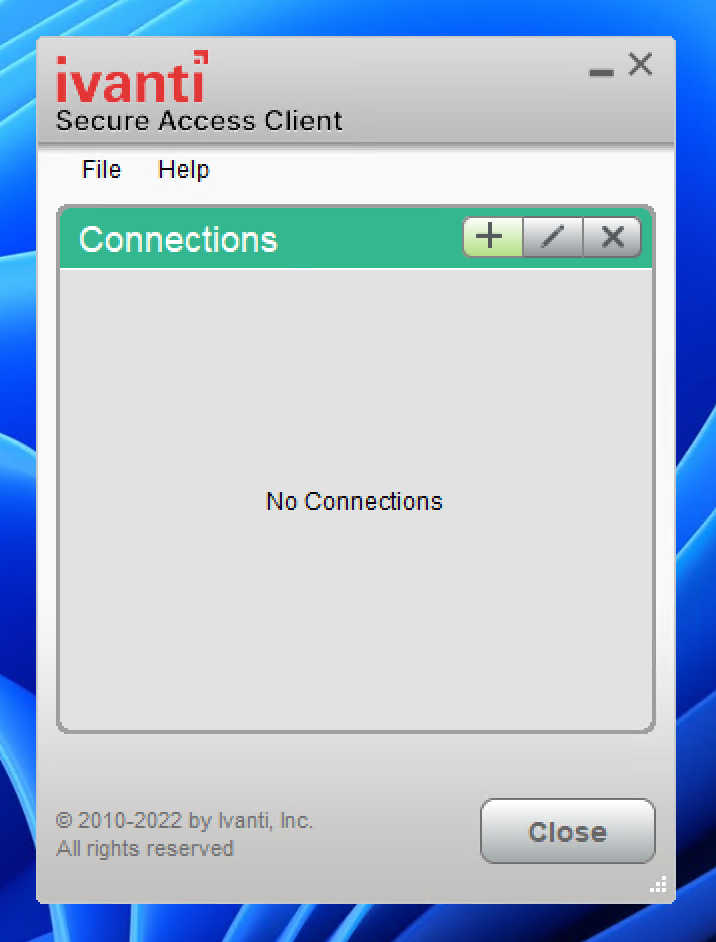
3. Click on the “+” sign to add a connection.
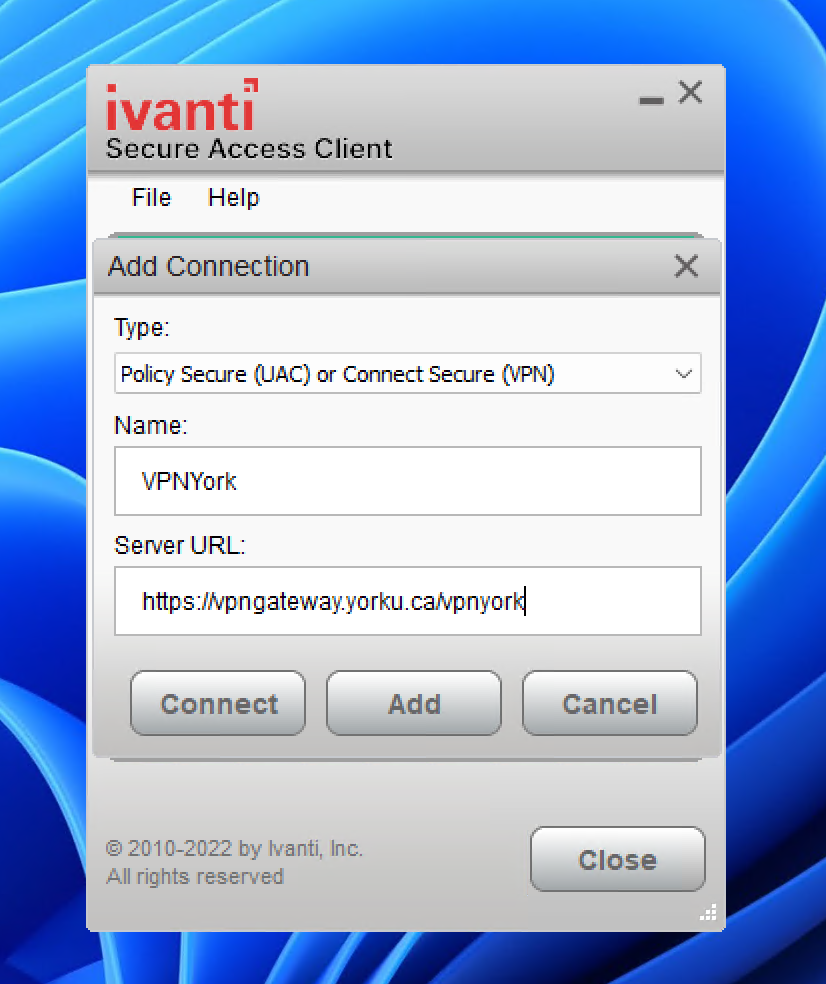
4. In the Name field enter a description name for your SSLVPN profile.
In the Server URL field put in the server name for your SSLVPN Profile:
- (example: https://vpngateway.yorku.ca/vpnyork for regular VPN) in the Server URL field and click ADD.
Steps to Download Ivanti Secure and Pulse Secure
1.
- Pulse Secure version 9.1r15.4-b17585*
- Pulse Secure version 9.1r15.2-b17113
- Ivanti Secure Version 22.6r1.2-b27593*
- Ivanti Secure Version 22.3r2.0-b19787
* Latest Version
1. If you are using Mozilla Firefox then click on the installer and login to Passport York when prompted.
2. Then click on the installer again while pressing the “Control” button on your keyboard, click on “Save link as” to download Pulse Secure to a location of your choice.
3. Open the Package > click Continue, click Install> Click Close to complete the installation.
**Please note if you see a pop-up error message that states “PulseSecure.dmg can’t be opened because it is from an unidentified developer”, then click ok. Click on System Preferences > Security and Privacy. Click on the lock to make changes if necessary. Make sure that under Allow apps downloaded from, Anywhere is selected. Repeat Step 2 and complete the installation.
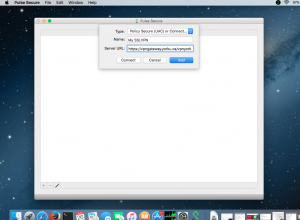
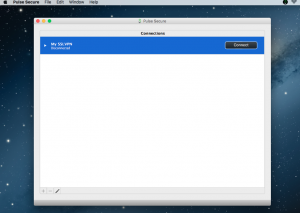
Steps to Configure Pulse Secure on MacOS
1. To start Pulse Secure select the Pulse Secure icon from the Applications folder.

2. To create a new connection:
3. Click the plus sign “+”
4. Enter a name for the connection for e.g. My VPNYork.
5. Enter the URL for your SSLVPN (e.g. https://vpngateway.yorku.ca/vpnyork) and enter it in the Server URL field and click ADD.
6. Click Add.
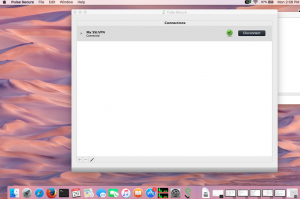
7. Click Connect to start your SSLVPN session
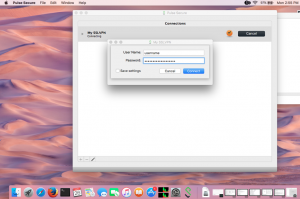
8. Enter your PPY username and password.
9. The Pulse Secure icon in the status bar indicates an active SSLVPN session.
Download the appropriate client:
- CentOS/RHEL Version 9.1r15.4-b17585 * (64-bit)
- CentOS/RHEL Version 22.6r1.2-b27593 * (64-bit)
- Linux RPM Version 9.1r15.4-b17585* (64-bit)
- Linux RPM Version 22.6r1.2-b27593* (64-bit)
- Ubuntu/Debian Version 9.1r15.4-b17585 * (64-bit)
- Ubuntu/Debian Version 22.6r1.2-b27593 * (64-bit)
* Latest Version
Installing VPN Client for Linux
The Pulse Secure client for Linux supports CLI-based installation.
The nss3-tools and net-tools are dependency packages required to successfully install the Pulse Client. Use the following commands to install these dependency tools manually.
Fedora: yum install
Ubuntu and Debian: apt-get install < dependency tool name >
The Installation Command:
Debian – based installation
dpkg -i
RPM – based installation
rpm -ivh
The Uninstallation Command:
Debian – based installation
dpkg -r
RPM – based installation
rpm -e
The upgrade from old Pulse client to new Pulse client is not supported.
**Please note if you have the old Junos Pulse app installed you must first uninstall this before installing Pulse Secure.
1. On your iOS device, open the App Store and search for Ivanti Secure Access Client
(Alternatively you can go directly to the Ivanti Secure App Store page using Safari)
2. Tap Get beside “Ivanti Secure Access Client” from company “Pulse Secure LLC”
3. Tap Install
4. After installation is complete open the Pulse Secure app
5. The first time you launch the software you must click “Accept” to accept the license agreement.
6. Tap Enable Ivanti Secure Access Client
7. On the VPN tab select Configuration
8. Enter the following information:
Name: This field can be left blank or you can type whatever you wish e.g. York VPN
URL: Enter the VPN Link that you wish to connect to. For most people this will be: https://vpngateway.yorku.ca/vpnyork
Username: Enter your Passport York username
Authentication: Leave this as Password
Realm: Leave this field blank
Role: Leave this field blank
9. Tap Save
10. At the main Pulse screen tap Connect
11. Type in your Passport York password at the following screen.
12. Tap Sign In
13. You should be taken back to the main Pulse Secure screen and see: Status Connected. You should also see the “VPN” box in the iOS status bar.
**Please note if you have the old Junos Pulse app installed you must first uninstall this before installing Ivanti Secure.
Steps to Download Ivanti Secure
1. On your Android Device, open Google Playstore and search for Ivanti Secure. (Alternatively you can go directly to the Ivanti Secure Google Playstore page using Chrome)
2. Tap Ivanti Secure
3. Tap Install and then Accept
Steps to Configure Ivanti Secure
1. Tap Open to launch Ivanti Secure
2. Tap Accept to accept the End User License Agreement (You only have to do this once)
3. Tap on Add Connection
4. Enter the following information:
Name: Type the name for your VPN connection. For example My VPNYork
URL: Enter the VPN Link that you wish to connect to. For most people this will be: https://vpngateway.yorku.ca/vpnyork
Username: Enter your Passport York username
Authentication Type: Ensure Password is selected
Realm: Leave this field blank
Role: Leave this field blank
5. Tap on Create Connection
6. The newly created connection is now listed on the Connections listing.
7. To open a VPN connection tap Connect on the main Ivanti screen
8. The Secure Remote Access login page is presented. Enter your PPY username and password and tap Sign In
9. In the Connection request screen tap Ok (You only have to do this once)
10. To see the VPN Status details select Status. This entry lists your assigned SSLVPN YorkU IP and other connection details.
11. You should be taken back to the main Ivanti Secure screen and see: Status Connected. If not, then you can press the back button. You should also see a key icon in the Android status bar.
12. To end your VPN session Tap Signout
If you wish to verify your hardware is compatible see: Ivanti Secure Access Client Supported Platforms
**Please note if you already have Ivanti Secure Access installed and setup for you by your Faculty IT support team read the instructions below for how to connect to York’s VPN.
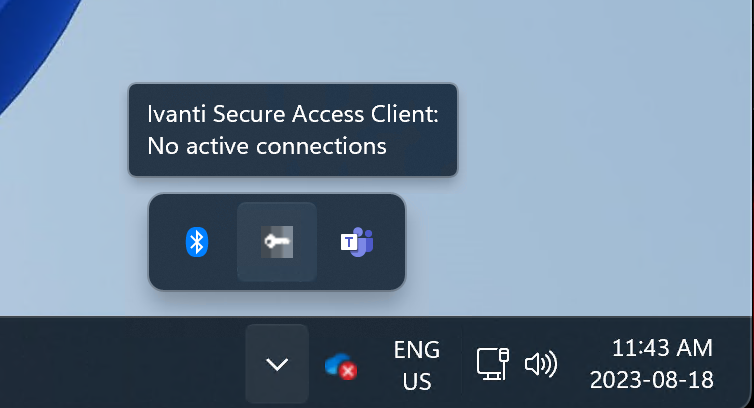
1. On your system tray, in the bottom-right of your screen, click the up arrow and locate the Pulse Secure icon.
2. Right-click on the Pulse Secure Icon and choose “Open Pulse Secure”.
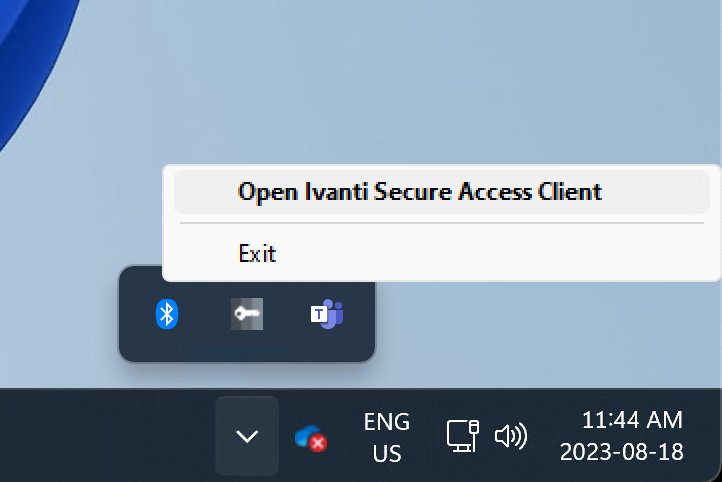
3. In the Pulse Secure window, choose “Connect” on the VPN Profile that you normally connect to.
- In the case that you do not see any VPN profiles listed, click the “+” icon.
- In the box that appears, enter the details as shown in the image below, then click “Connect”.
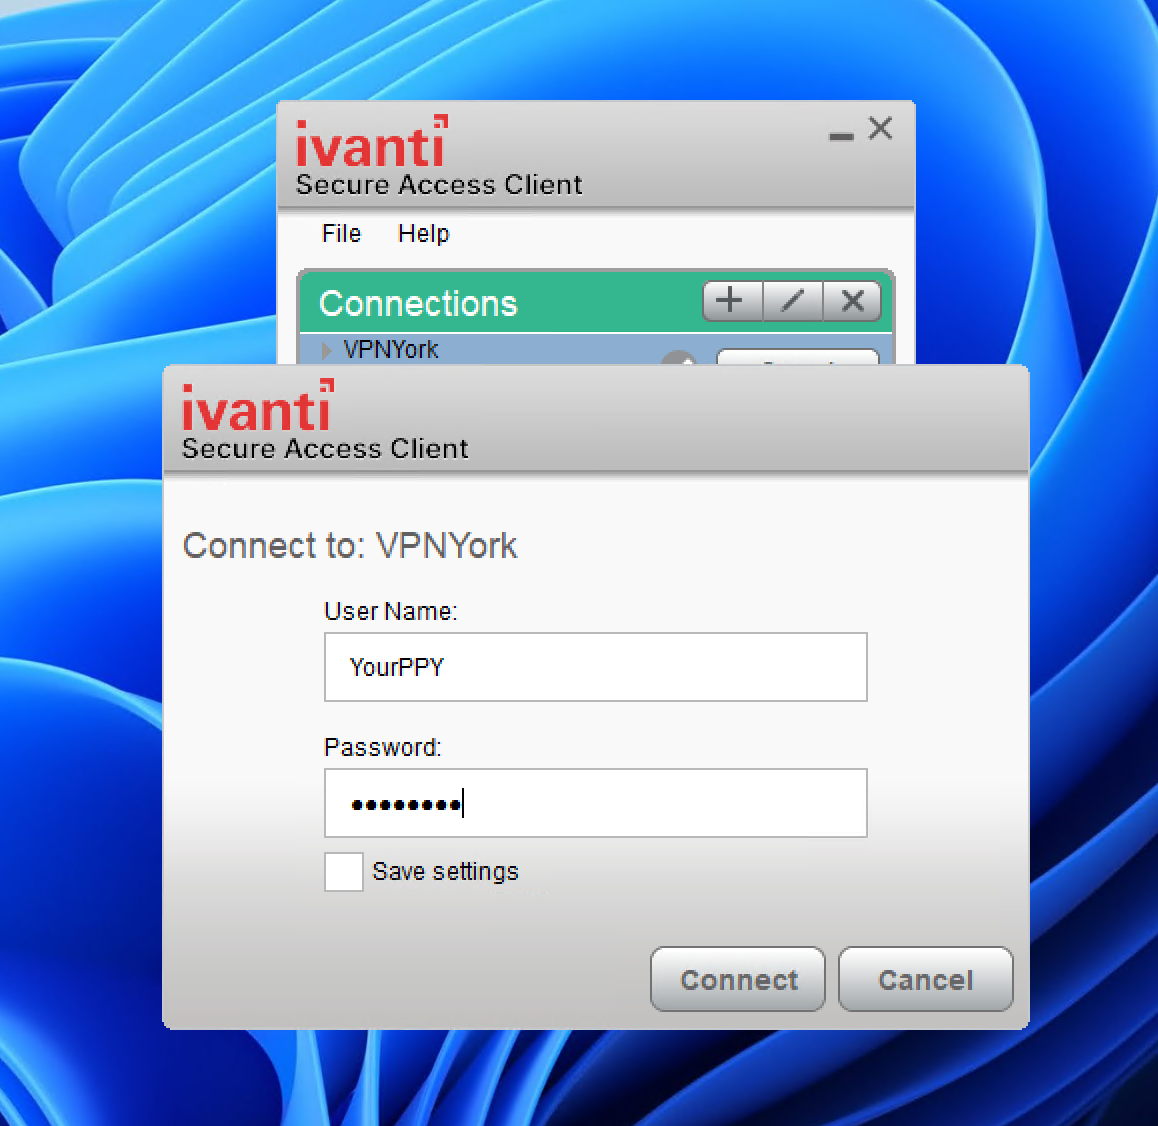
4. In the box that pops-up as shown below, enter your Passport York username and password, then click “Connect” (You can choose whether or not to check the box to save your credentials).
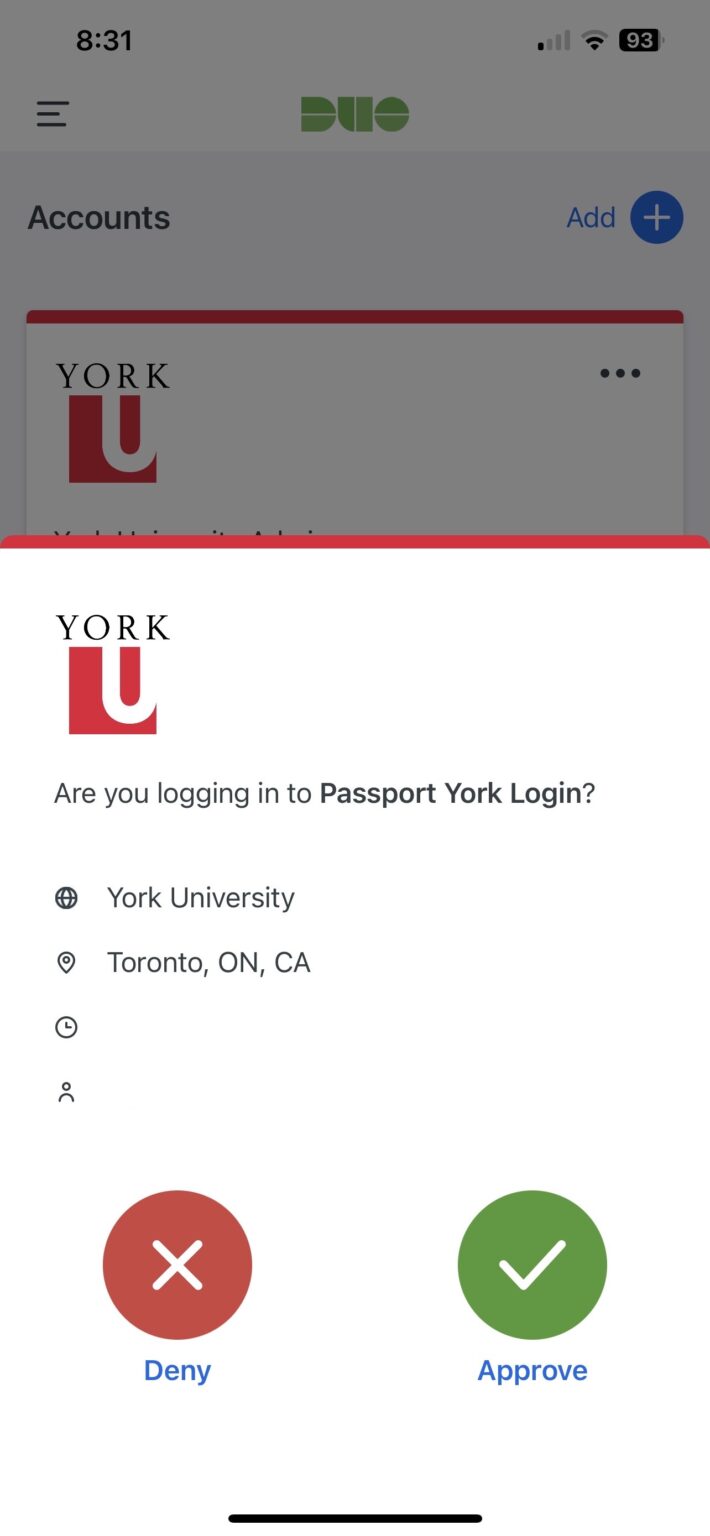
5. After clicking connect, you will need to open the Duo app on your phone and approve the Duo Push to connect to VPN. If you are using an alternative method of authentication (e.g. you are using a Duo Token or are enrolled in 2FA/Duo via SMS/Text Messaging), or have more than one device registered on your Duo profile, please follow the instructions on this page to authenticate your login attempt.
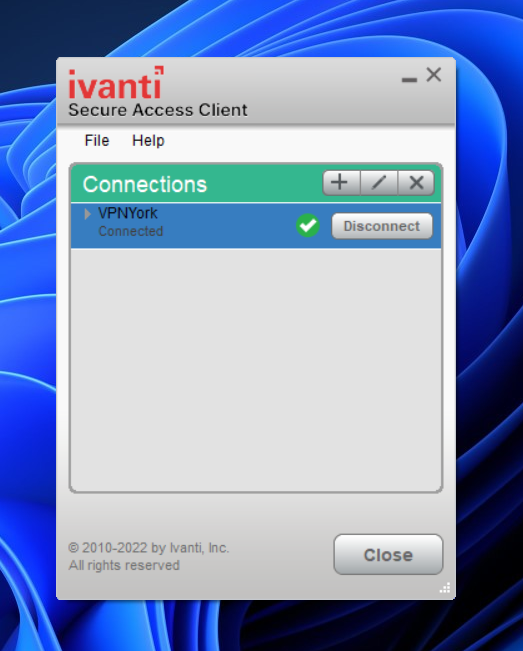
6. The VPN is successfully connected when you see the screen as below.
If you receive an “Invalid Credentials” error, please try Forgetting your Saved Settings and try steps 4-6 again.
Starting on June 24th, 2021, the regular VPN York profile (https://vpngateway.yorku.ca/vpnyork) will include split tunneling to improve the Office365 and Zoom meeting experience. This means that the VPN will no longer slow down your virtual meetings, and you will experience faster connection speeds and better call quality.
The Dynamic Host Configuration Protocol was established to relieve the administrative burden of assigning and maintaining IP address information for internetwork connections. DHCP provides automatic and reliable TCP/IP network configuration, insures that address conflicts do not occur, and supports centralized management of address allocation.
When a client device needs to start up TCP/IP operations, it broadcasts a request for address information. The DHCP server assigns a new address and sends this to the client together with the lease duration, address of the client’s gateway and the subnet mask for the network that the client is on. This information is acknowledged by the client and used to set up its network configuration. It eliminates much of the work required to set up clients manually and reduces the number of user errors caused by unfamiliarity with networking parameters. The network administrator controls which IP addresses are assigned, the maximum duration of leases, and other configuration parameters available to clients through DHCP. An IP address is available for reallocation once its lease has expired. A client moving from one subnet to another must request a new IP address on the new subnet; this allows people with portable devices to move between subnets and remain connected to the network without the need for manual configuration.
Network Operations maintains a campus-wide DHCP service. Many departments depend on this service to manage the assignment of IP addresses to computers in labs, classrooms and offices. DHCP is also used to assign IP addresses to devices using AirYork, eduroam and Yorknet.
Configure your device to obtain network settings automatically
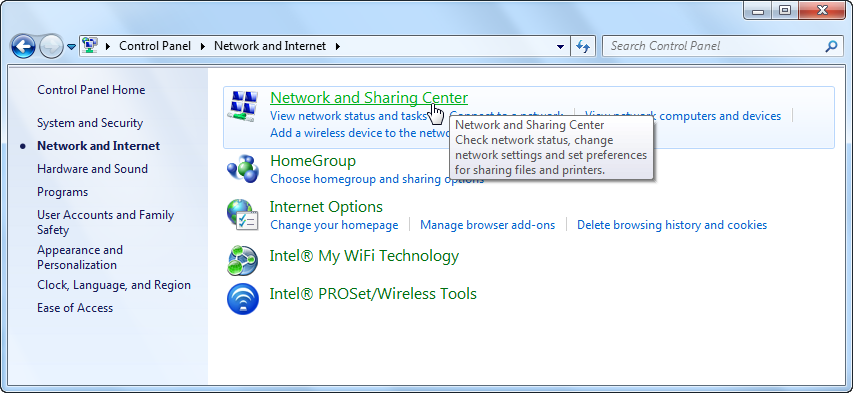
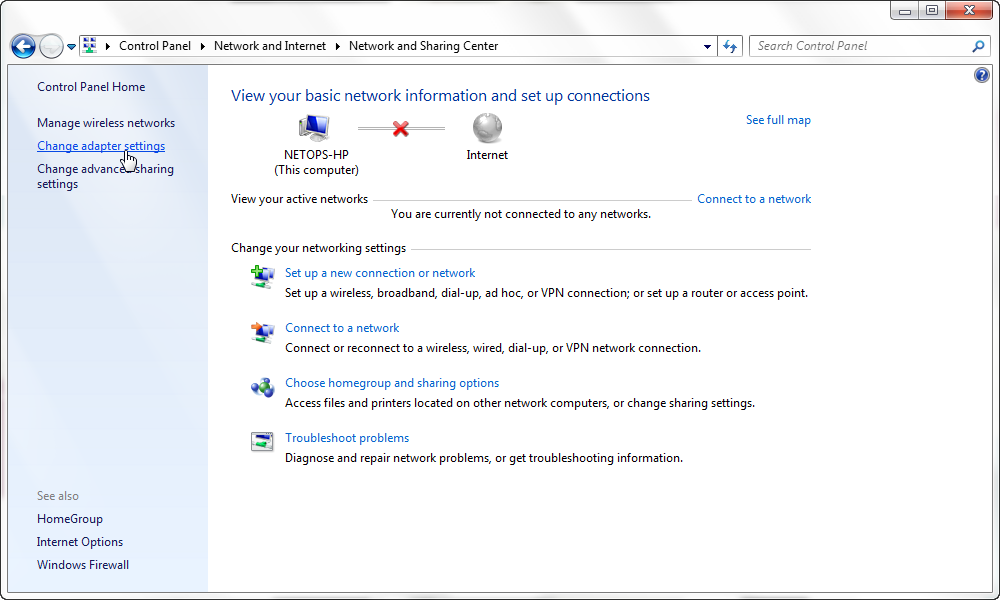
1. From the Start menu, select Control Panel, Network and Internet and Network and Sharing Center.
2. Select Change Adapter Settings from the left-hand sidebar.
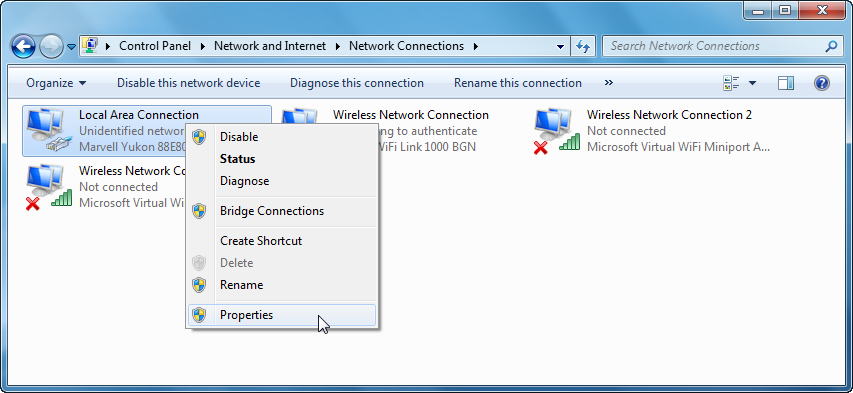
3. In the Network Connections window, right-click on the Local Area Connection icon and select Properties.
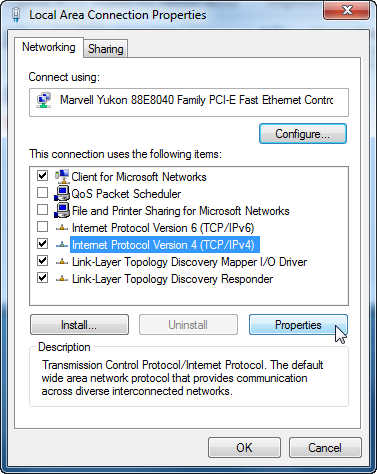
4. In the Local Area Connection Properties window, ensure Client for Microsoft Networks and Internet Protocol Version 4 (TCP/IPv4) have check marks. Select Internet Protocol Version 4 (TCP/IPv4) and click Properties.
5. In the General tab, ensure Obtain an IP address automatically and Obtain DNS server address automatically.
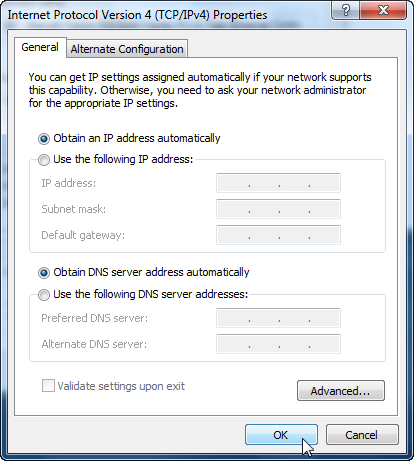
6. Click OK to close all open windows.
1. Click on the Apple Menu and select System Preferences. Under Internet and Network, click Network.
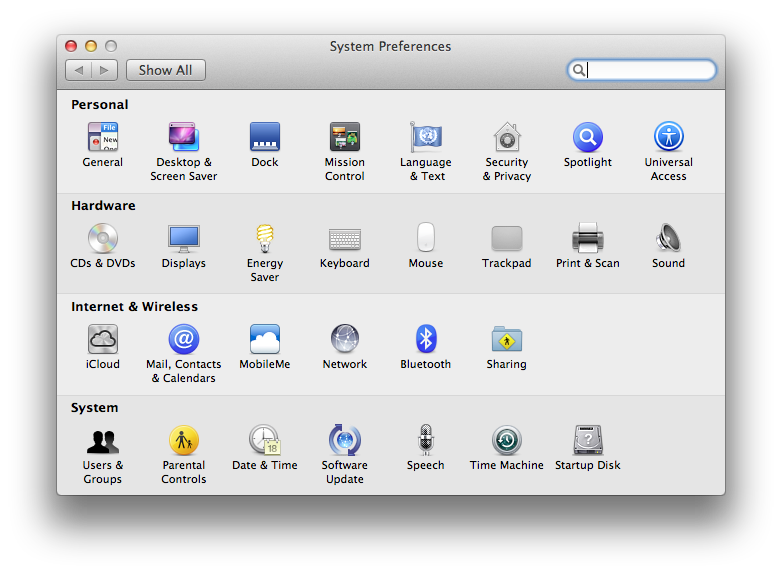
2. From the left-hand sidebar, select Ethernet and ensure that the setting under Configure is Using DHCP.
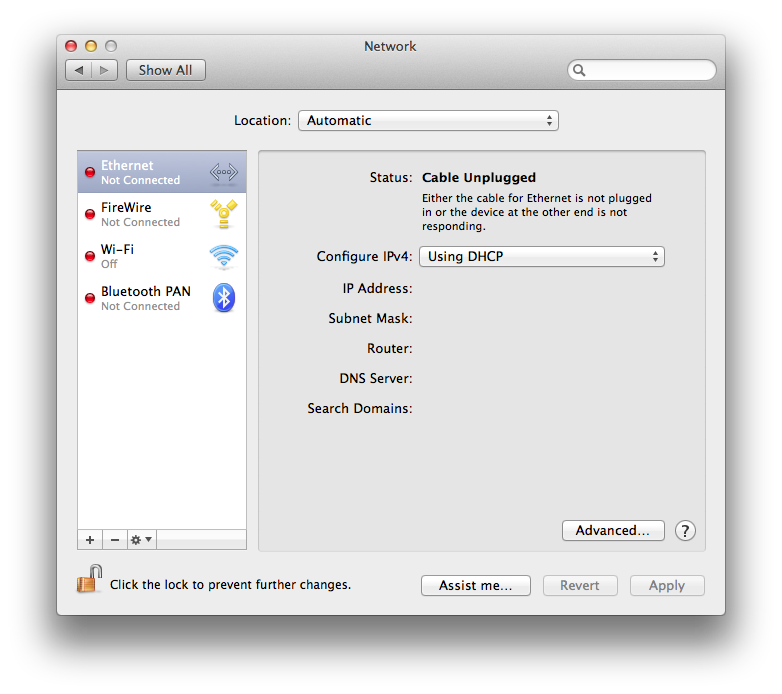
3. Click Apply and close the Network window.
The DNS servers are used by internet applications to convert host names to network IP addresses. UIT recommends that users configure their computers to use the DNS servers indicated below, depending on their location and the service in use. Configuring multiple DNS servers will ensure redundancy and continued service during a single server outage.
Internal DNS Servers:
The internal DNS servers serve all of the York Community, excluding wireless clients and the Keele campus residence community.
Keele Campus DNS Servers:
130.63.9.130 ns11.ipns.yorku.ca
130.63.10.130 ns21.ipns.yorku.ca
Glendon Campus (including Glendon Residence) DNS Servers:
130.63.9.226 ns31.ipns.yorku.ca
130.63.10.130 ns21.ipns.yorku.ca
Public DNS Servers:
The public DNS servers serve all wireless clients, as well as clients in residence at the Keele campus.
Keele Campus Residence DNS Servers:
130.63.9.18 nspub11.ipns.yorku.ca
130.63.10.18 nspub21.ipns.yorku.ca
IP Address Requests:
To apply for an IP address please submit the online IP address request form.
The Network Time Protocol is used to synchronize the time of a computer to a reference time source, such as a satellite receiver, atomic clock or another computer. It provides client accuracies typically within a millisecond on LANs and up to a few tens of milliseconds on WANs relative to a primary server synchronized to Coordinated Universal Time (UTC).
York’s NTP service utilizes multiple redundant servers and diverse network paths to achieve high accuracy and reliability.
NTP Servers
Internal NTP servers
Serving all of the York Community, excluding the Keele Campus Residence Community.
| Keele campus NTP Servers:– ntp11.ipns.yorku.ca – ntp21.ipns.yorku.ca | Glendon Campus NTP Servers: (including Glendon Residence)- ntp31.ipns.yorku.ca – ntp21.ipns.yorku.ca |
Public NTP Servers
Serving serve clients in Internet in Residence, AirYork, YorkNet and Resair.
| Keele Campus Residence NTP Servers – ntppub11.ipns.yorku.ca – ntppub21.ipns.yorku.ca |
Whenever possible, hostnames should be used to configure NTP clients. IP addresses can be subject to change without notice.
Frequently Asked Questions
AirYorkPLUS FAQs
If you have not changed your password in over a year you may need to change it now. Follow the instructions below to change your password:
- Close all open browser windows.
- Start up web browser and go to mms.yorku.ca
- Click on the check box beside “Click this box before logging into to change your Passport York password”. Log in using your current Passport York username and password. Follow the prompts to change password. Note: Password can only be 7 or 8 characters long and may not contain a semi-colon (;) or double quotes (“).
- Wait around 10 minutes before connecting to AirYorkPLUS.
If you have forgotten your username or password then follow the instructions for resetting Passport York.
This is due to a mis-configured Wi-Fi client profile. Delete the Wi-Fi profile for AirYorkPLUS from your device and then recreate it. Use the the AirYorkPLUS Setup Application tool if your computer is MS-Windows.
If you see the following message, it means you have not followed the AirYorkPLUS configuration instructions fully. However, you can still connect to AirYorkPLUS and not see this message again by clicking on the Details arrow and verifying the following:
- Radius Server: authenticate.yorku.ca
- Root CA: GlobalSign Root CA
- Once verified, click Connect.
For best performance, particularly In high-density settings such as lecture halls and libraries, you need to ensure that the Wi-Fi radio in your client device is capable of supporting the performance features of AirYorkPLUS. Your experience of Wi-Fi performance on-campus may suffer if your wireless client device cannot operate in the 5 GHz radio band, and if it does not support the Wi-Fi 5 protocol or later. For more information on how to achieve optimal Wi-Fi speeds at York, please consult UIT’s recommendations on selecting / purchasing a Wi-Fi client device.
For Windows 10 / 11 users there are a few network adapter settings available that can help ensure optimal performance.
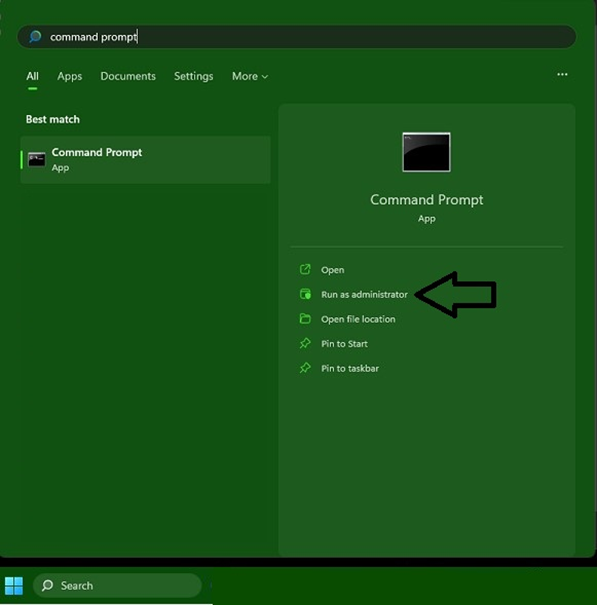
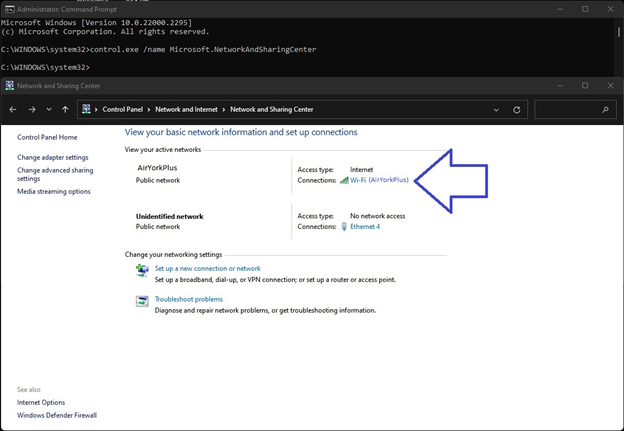
- Click the Windows icon on your keyboard or bottom left of your screen and search for “Command Prompt” as an administrator (by searching for it in the same way but right clicking on it and selecting “Run as administrator”) and run the command by copying and pasting this and pressing enter:
control.exe /name Microsoft.NetworkAndSharingCenter
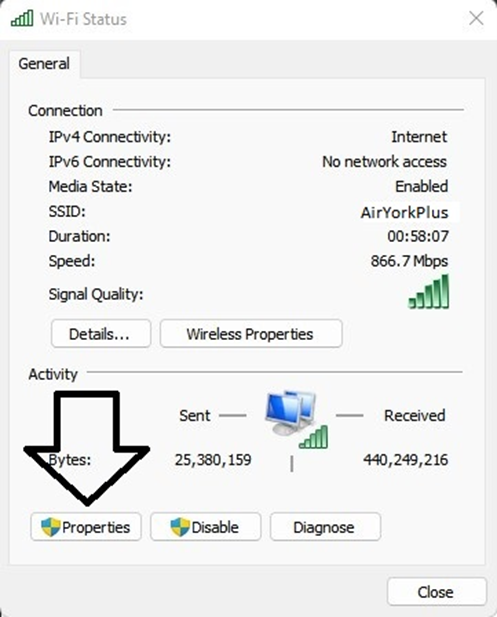
2. Click on “Connections: Wi-Fi (AirYorkPlus)” and a new window should pop up
3.Click on “Properties” and a new window should pop up
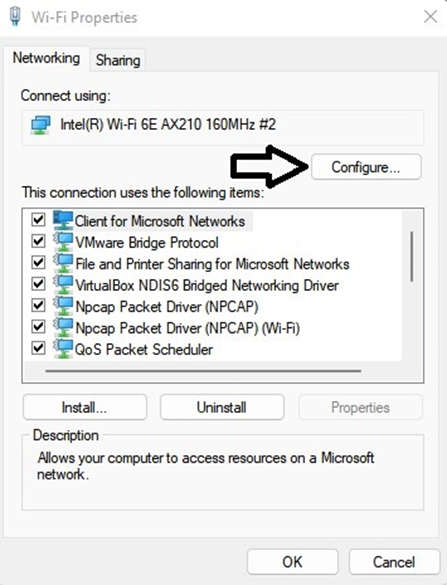
4.Click on “Configure” and a new window should pop up
5. Click on “Advanced” and change the following settings:

6.“Preferred Band” to “Prefer 5GHz band” or “Prefer 5GHz + 6GHz band”
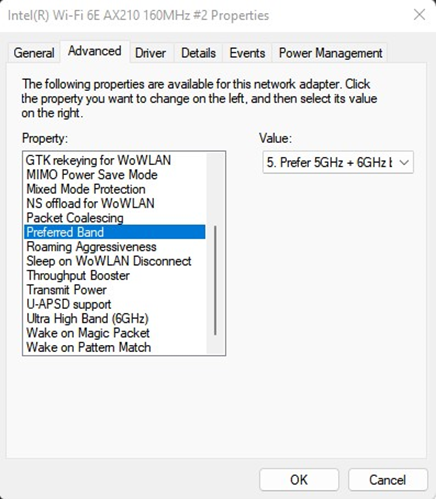
7.“Roaming Aggressiveness” to “5. Highest” (or the highest available option) (experimental, revert if quality worsens)

8.Press “OK” to save your settings
eduroam FAQs
If you have not changed your password in over a year you may need to change it now. Follow the instructions below to change your password:
- Close all open browser windows.
- Start up web browser and go to mms.yorku.ca
- Click on the check box beside “Click this box before logging into to change your Passport York password”. Log in using your current Passport York username and password. Follow the prompts to change password. Note: Password can only be 7 or 8 characters long and may not contain a semi-colon (;) or double quotes (“).
- Wait around 10 minutes before connecting to AirYorkPLUS.
If you have forgotten your username or password then follow the instructions for resetting Passport York .
This is due to a mis-configured Wi-Fi client profile. Delete the Wi-Fi profile for eduroam from your device and then recreate it.
If you see the following message, it means you have not followed the eduroam configuration instructions fully. However, you can still connect to eduroam and not see this message again by clicking on the Details arrow and verifying the following:
- Radius Server: authenticate.yorku.ca
- Root CA: GlobalSign Root CA
- Once verified, click Connect.
For best performance, particularly In high-density settings such as lecture halls and libraries, you need to ensure that the Wi-Fi radio in your client device is capable of supporting the performance features of AirYorkPLUS. Your experience of Wi-Fi performance on-campus may suffer if your wireless client device cannot operate in the 5 GHz radio band, and if it does not support the Wi-Fi 5 protocol or later. For more information on how to achieve optimal Wi-Fi speeds at York, please consult UIT’s recommendations on selecting / purchasing a Wi-Fi client device.
For Windows 10 / 11 users there are a few network adapter settings available that can help ensure optimal performance.
- Click the Windows icon on your keyboard or bottom left of your screen and search for “Command Prompt” as an administrator (by searching for it in the same way but right clicking on it and selecting “Run as administrator”) and run the command by copying and pasting this and pressing enter:
control.exe /name Microsoft.NetworkAndSharingCenter
2.Click on “Connections: Wi-Fi (AirYorkPlus)” and a new window should pop up
3.Click on “Properties” and a new window should pop up
4.Click on “Configure” and a new window should pop up
5.Click on “Advanced” and change the following settings:
6.“Preferred Band” to “Prefer 5GHz band” or “Prefer 5GHz + 6GHz band”
7.“Roaming Aggressiveness” to “5. Highest” (or the highest available option) (experimental, revert if quality worsens)
8. Press “OK” to save your settings
AirYorkGUEST FAQs
VPN FAQs

Learn More
Not finding what you are looking for or need technical assistance? We are here to support you!